Inside the FN Montcalm
Class 2 Light Cruiser 2.5 battle units
Build by Bob Hoernemann
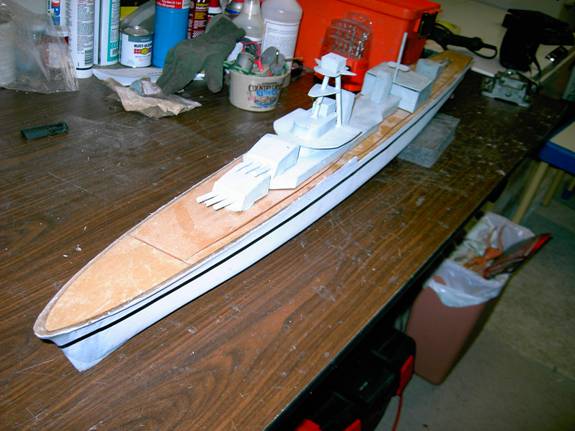
I got this Swampworks hull from Steve just as he closed up shop. I had wanted one for a couple years but had other projects. Ben Radenbaugh & I both got hulls at the same time he had his built first and made us eat sterns in 2007. I started mine that spring and built it while making the How to Build a Warship video. I got it done and realized I had not taken one photo of it during construction. I finished it up just in time for the last battle of 2007. I took it on sea trails and it sank in 30 seconds. It was a little too heavy and took on too much water in a turn. After moving the weight around and taping the stern deck it battled pretty that cold day. Here is the front of the ship with the first superstructure. Each of the real ships where refitted with different SS during their life times. This is built with ABS plastic. The turrets turned out a little bigger then the should have been.
The long stern makes for a very hard target on the water. Since it sits so low in the water it is hard to hit. This also makes for a good stern gun platform. A level set of guns can range out and hit just at the water line from close to the ship to a few feet away. The large aircraft hanger is a good place to hide the fill points of the mags.
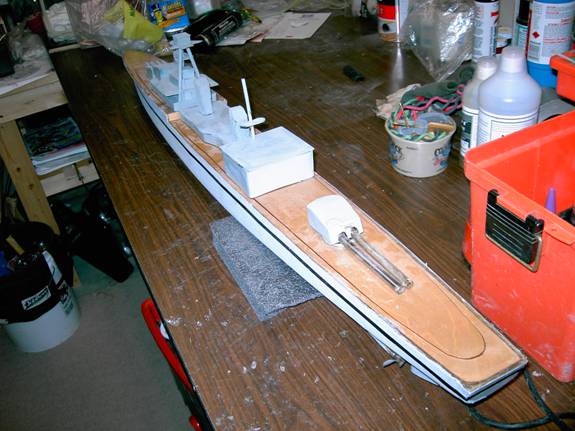
Just like in The Bike I put the gun fill points in the aircraft hanger. I have the mast going through the deck into a sleeve inside the hanger this holds the deck in place along with the two pieces of foam at the corners. The hole in the deck is siliconed around the guns to keep the water out. The guns a held in place at this end with two zip strips and three holes in the deck.
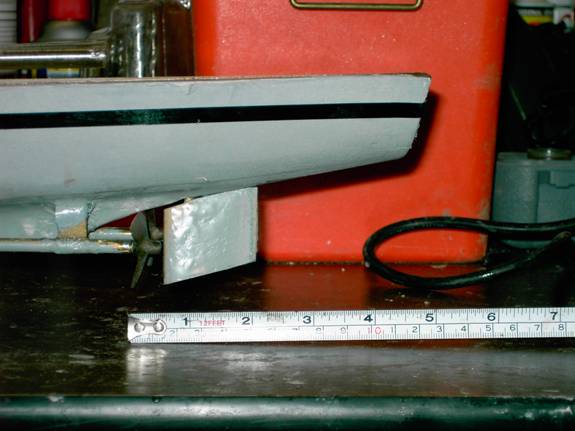
The side view of the rudder and props. I kept the rudder angled up with the sharp incline of the hull. This ship turned pretty well, not as well as The Bike but good enough to keep it out of trouble. The props are 1 ½” three blade Dumas cast props, I sanded them down to 1 ¼” and installed them backwards so I have better reverse acceleration.
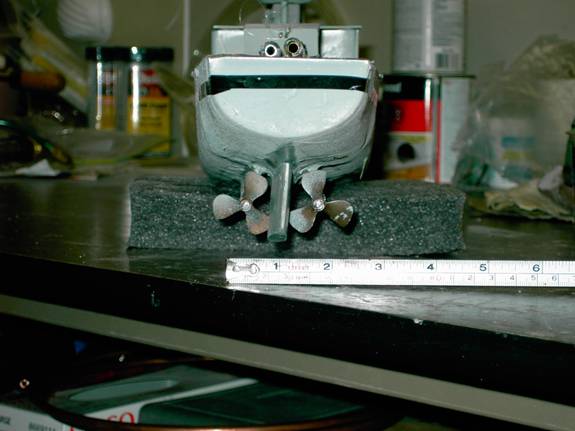
A stern view of the props and rudder.
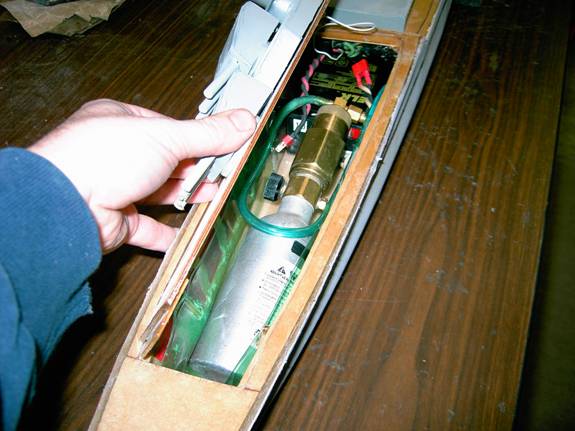
The top deck has a slide at the
front and snaps in place. The regulator needs to be changed to a light weight
one to reduce some of the weight in the ship. Legal weight is about 11lbs.
Right now the ship is 10.5lbs. Most guys run this class of ship at 9lbs. The
battery is an
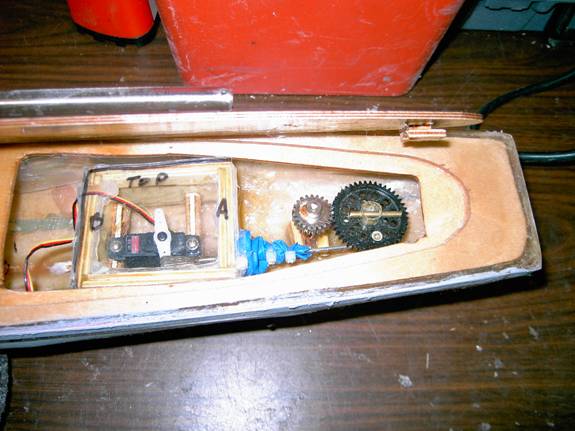
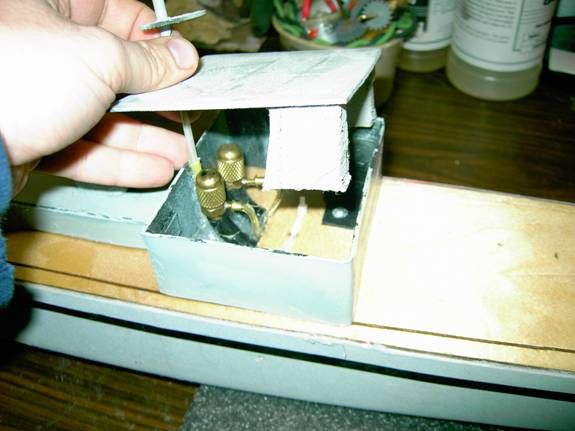
The stern rudder box and ruder gear set up. I spent a lot of time going over different ways to do this and the simplest answer was the best. You can see the stern slide on the bottom of the deck.
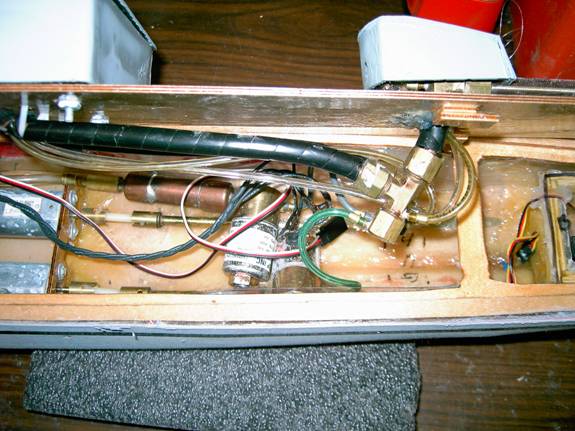
The deck has two slides on this cross brace. I wanted to try and keep the stern deck as water tight as I could since it sits so low in the water. The solenoids sit between the motor mounts and the guns. The guns come up though the turret and the holes are siliconed in place. On most of my ships I have the motors strapped to the motors mounts. I use two pieces of plywood with rod between them. This ship I changed and made a motor mount that the motors screw into. It was a lot harder but is a much better application. The guns are the by-pass style I have been making for a couple years. The black plastic wrap protects the magazines from any stray bbs.
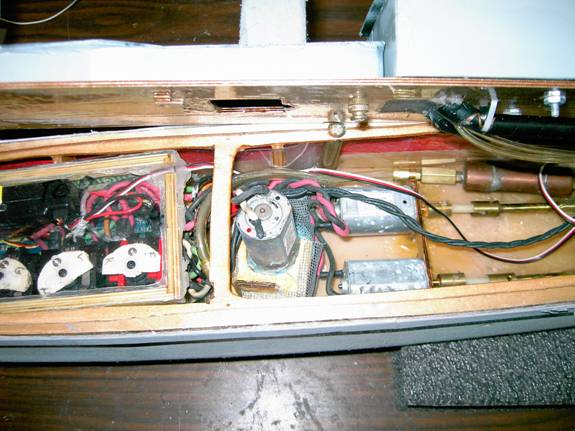
The pump was too tall to fit under the deck so I had to cut a small hole in the deck to get it through. This is the only hole in the deck that is not sealed shut. Good thing there was superstructure above or I would have had to find s shorter motor. The pump is surrounded by a housing and screen that I am using on all my ships. For interior armor I am using pop bottle plastic as it is lighter then the shower pan armor. I put 1” long ¼” pieces of plywood on the ribs to hold the armor up. You can see how tight the wiring is right behind the radio box. I used micro servos to save space in the box. I could have saved more space using Team Delta boards instead of the servos. I also could have used a smaller receiver.
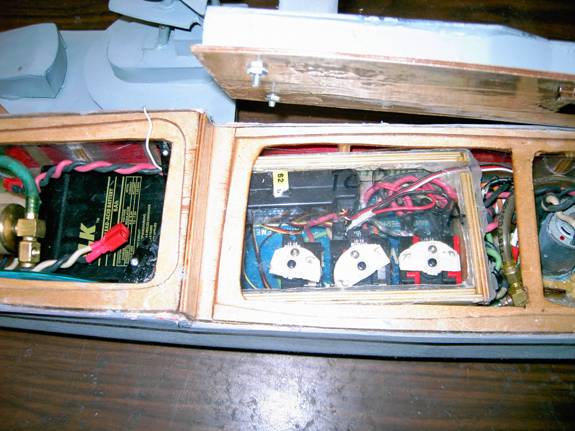
The superstructure is held on the deck with bolts and nuts so it can be taken off when it gets packed in the car. A better shot of the radio box shows the throttle on the right, pump and light switches and the gun switch on the left.