Inside the USS Washington (
Class 6 with 6 Battle Units (5 guns 1 pump)
Rated at 24 sec over 100’ course
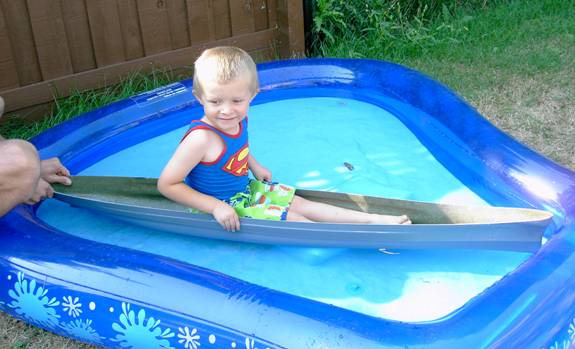
The first “Sea Trials” for the new hull I brought back from NATS 2007. My son Zach was about 35 pounds (The weight of the ship) so we put him in the ship in our wading pool. They grow up too fast, or they could battle the ship from inside. This is not as bad as Lars holding his first born (Grant) for the first time and saying “Hey he weights about as much as my cruiser!”
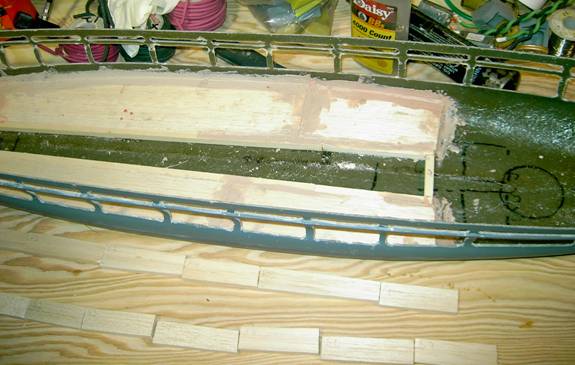
Guess I should have taken a
photo of it before I cut out the hull. I laid out and taped the hull Labor Day
Weekend 2007 in

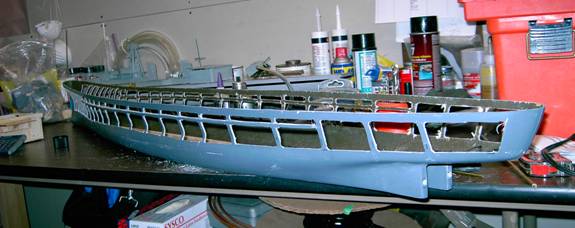
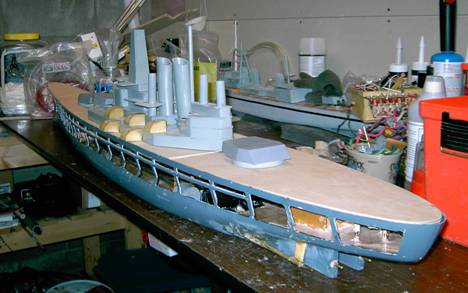
The front of the ship. The first few ribs are a little over 1” apart. I’m hoping to keep out some of those stern guns.
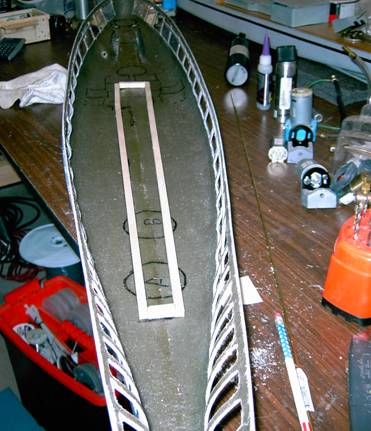
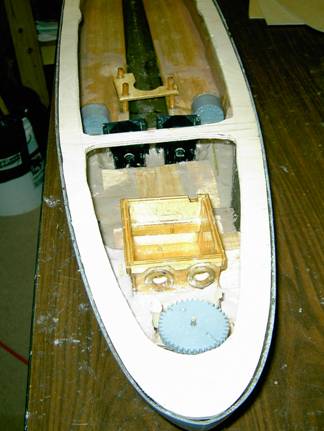
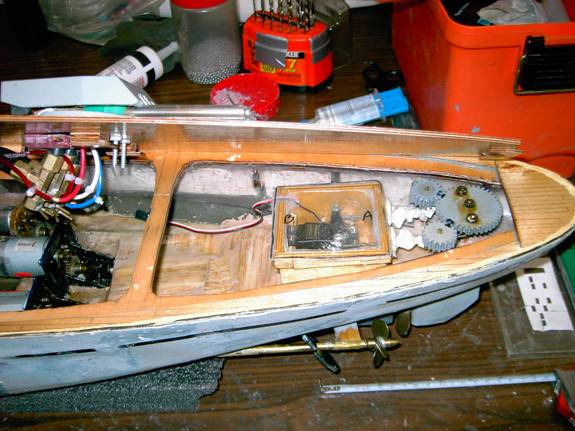
The internal lay out of the ship. I marked the turrets, probable motor placements, the rudder gears and rudder box on the bottom of the hull. The guns, rudders and motors are stuck in place. Other stuff needs to be built around them. The ¼” square spruce (I think it was spruce) is the start of the water channeling. Wide enough for the pump at the stern a little less at the bow.
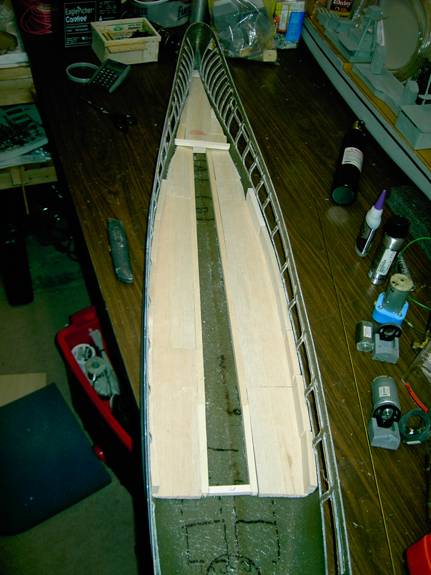
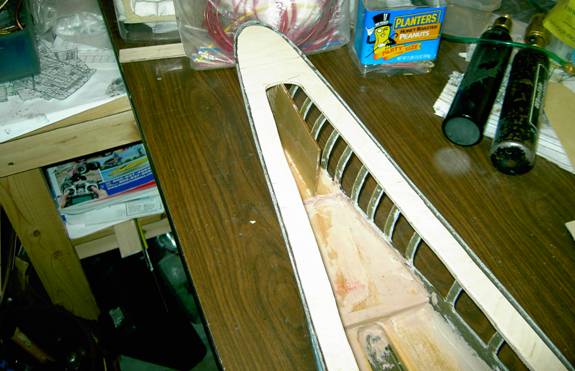
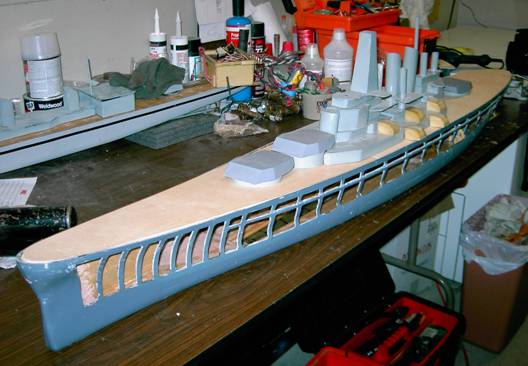
The start of the balsa wood water channeling. It will be 3/4” think at the bow and ¼” until the stern. Just enough to get the pump to prime quickly. Too much (Like I had in Warspite in 2004) and the water will make the ship top heavy. When you take damage you’ll list and sink before your reserve buoyancy is gone. I have the sections by the large channel slopped to the center just a little. I am putting balsa in the bulges, hoping to keep the water in the center of the ship and keep her a little more stable.
This is the probable layout
with most of the parts in the ship. I will be installing a reverse system in
the ship by turning the outside motors in reverse only. This should help me
start/stop better than other NCs and maybe good enough to get away from the
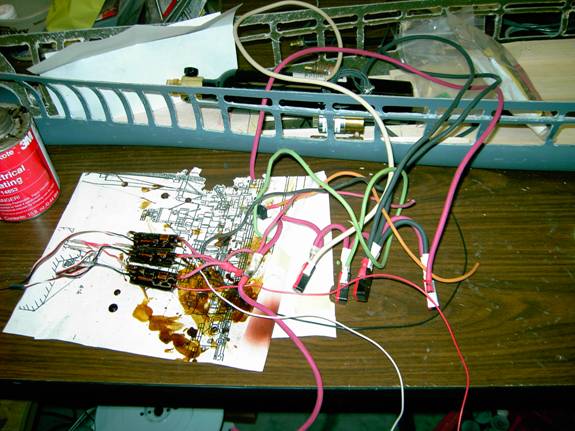
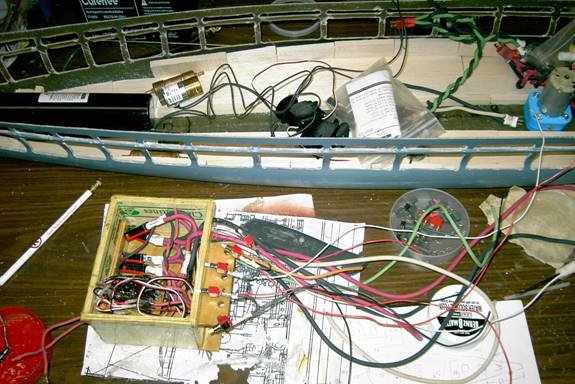
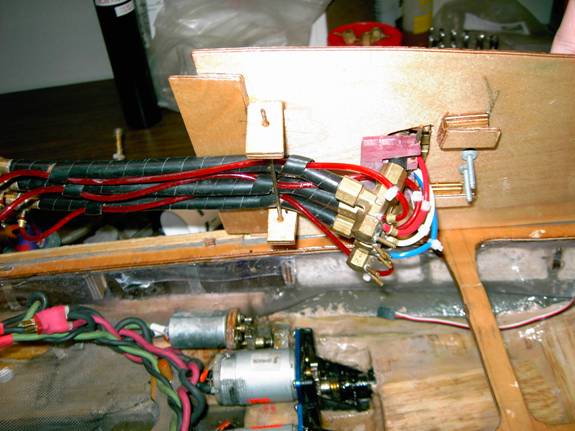
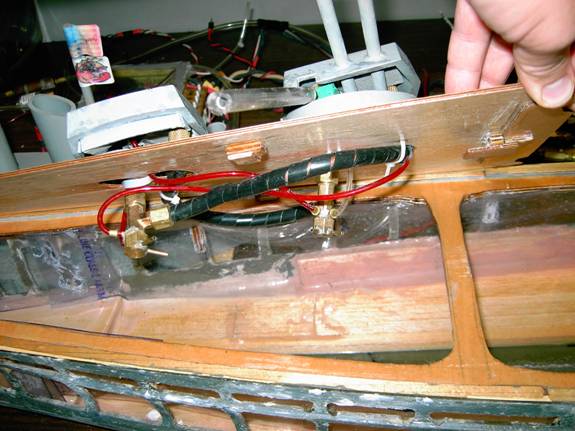
This mess is the wiring for the radio box. At the left are the Team Delta boards used to fire the guns. They are coated with 3M Scotch Coat, can at the left, to make them water proof. The switches are all attached to the red power line with out cutting the wire. I strip the wire and bend it in half to solder on the switch. This makes it easier to replace things as you don’t have to try and solder two wires onto one part. I’m using #12 wire for the main line, motors and pump. In my mind this is overkill I think #14 would be more then enough, but I had it so I’m going to use it. The smaller loads have smaller wire, #14 for the reverse motors, #16 for the lights, #20 for the guns. I have things color coded to try and make plugging together more fool proof. Red and Black are main power and power to the drive motors. Yellow for lights, white for pump, green for reverse motors, smaller size red, white & black for the guns. It will look better when it gets done.
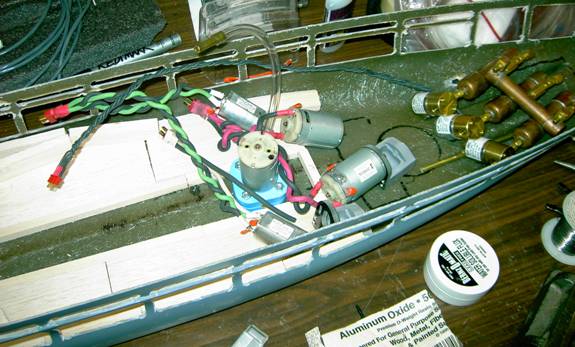
These are the motors & solenoids wired up.
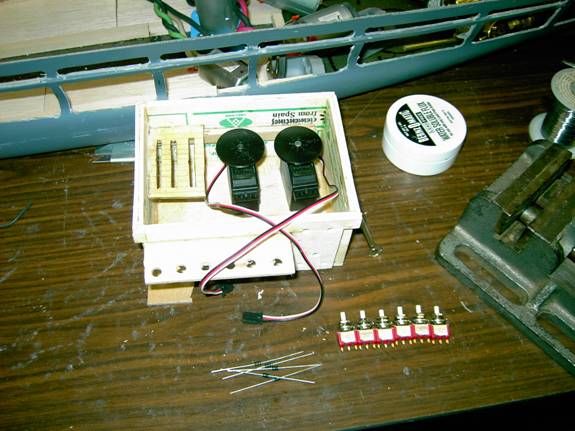
The general layout of the radio box before the wire goes in. The push buttons to test fire the guns will be mounted on the box. The little shelf in the box is for the Team Delta switches. Looks like a lot of room but there is not.
The wiring is still a mess but at least it is in the box.
The water channeling installation. I used Bondo to hold it down to the hull and fill in the gaps. The bulge blocks still need to be installed. I’ll sand everything smooth and seal it latter.
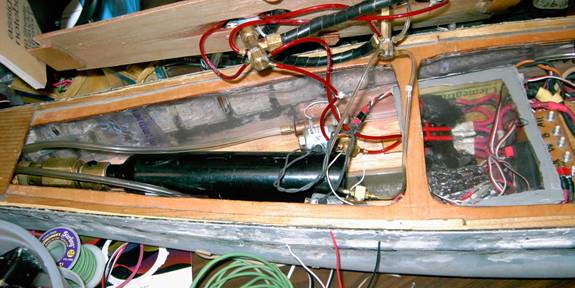
Here is the finished stern water channeling, gear boxes, rudder box and rudder gears. I am using the BC gears for the rudders, I like them a lot nice big teeth. The rudder box will have two arms coming out and into the bottom of the big gear. The water channeling is up to the bottom of the window from the stern to the front side of the rudder box. The gear boxes are now in place. I installed them with a little Bondo on the bottom of the hull and squished them in to fit. The Bondo takes long enough to harden (about 10 min) that you can move things around until they are just right. Once they are just right it stays in place. Right now everything is sealed with epoxy. The subdeck is cut, sanded to fit and ready to be installed. The pump housing is at the top of the photo
The bow of the ship also has the water channeling to the bottom of the window. There is a 1/8” piece of 5 layer plywood in the bow as interior armor. This way I don’t have to worry about keeping the shower pan liner in place up there.
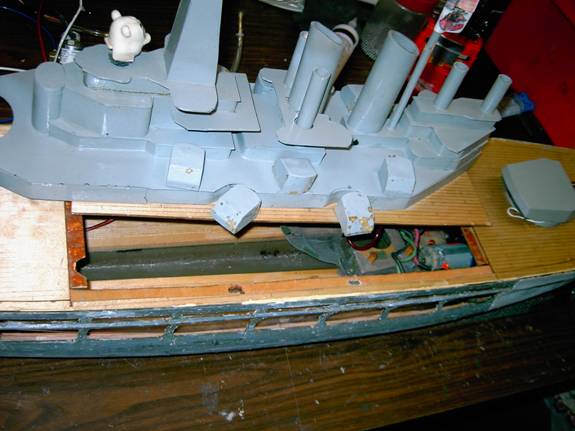
I just had to put the superstructure in place and take a pretty picture. Even I like to see the finished product part way through the job. The SS is made from ABS plastic. It was made it in the winter of 2005 and the “How To” is on the PPB web site.
The pretty bow shot.
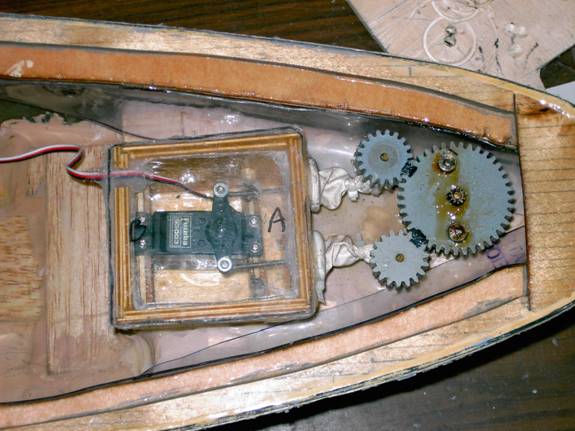
Here is the finished rudder box and rudder gears. The gears are from BC. The arms from the servo to the big gear are 6-32 threaded rod. They are bent at 90 deg angles with nuts holding them in place on the servo and collars holding them on the big gear. The two arms work very well with the larger rudders. The big gear sits on a shaft of built up brass tubes with a 1/8” rod in the middle. The gear spins on the shaft and rod. The balloons are used to keep the arms water tight and still flexible. The mouth end of the balloon goes over a small ring on the box. The other end is cut off and zip tied to the rod. The ring on the box is made from a ½” pipe cut to ¼” thick with a 1” round piece of 1/8” plywood glued over it. I’ve marked the gears so I know where they should line up when I remove and replace them. The dark stuff on the gear is Corrosion X that is keeping the collars from rusting. The water channeling in the stern is built up to the bottom of the penetrable window. It steps down right at the edge of the rudder box and slopes to the gears.
This is the center section of the deck. It holds the other two sections down. The little tabs glued into the 5” guns hold this deck down. They slide into the slots and turn to lock in place.
Here is an under the deck shot of the L bracket turned and locked into place. One on each side would hold the deck in place. Since there are 4 5” guns in just the right spot having two on each side works out very well.
The stern deck slides in place with a slide at the back that slips under the very last deck piece. There are two other slides just in front of the stern turret that slide under a cross brace.
The guns are held in place with a rod supported by two pieces of wood. The red plastic right under the deck holds the guns when they are being tweaked. The black plastic on the guns helps protects against bbs denting the mags. The plywood glued to the bottom of the deck gets held down by the center section so this section can’t move.
This is a shot of the bow deck when in place. You can see the two slides on the sides of the decks that latch under the sub deck. You can also see how the A turret gun has to bend to the side to fit around the bottle.
The deck also has a slid in the font and one that latches under the cross brace. Another piece of plywood is held down by the center section. The guns are filled through the turrets. I like this set up and it makes filling the guns very easy. Each gun barrel has a clear hose on it to protect from bb dents.
The center deck when locked down holds the bow and stern deck down. No screws for fast access and a tight seal.
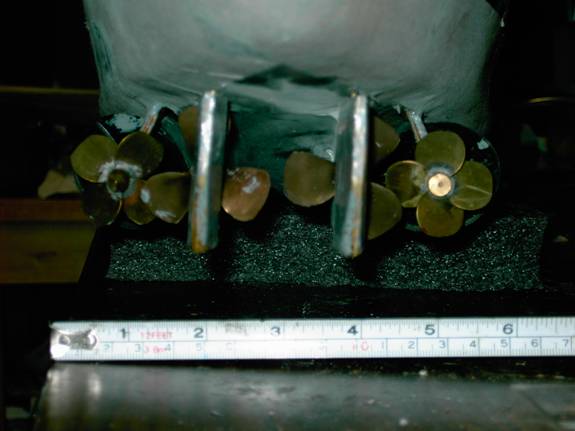
The props and rudders under the ship. I’m using 2” 3 blade Dumas cast props for the main drive. They are sanded down to 1 ¾”. The outer props spin in reverse only and are 1 ½” 4 blade 25 deg pitch. The rudders and right behind the skegs and props.
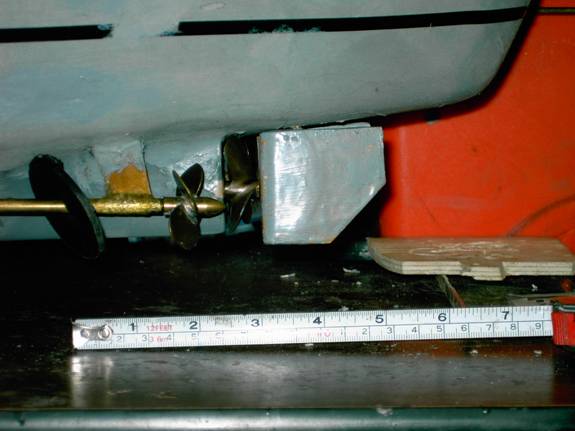
The side view of the props and rudders.
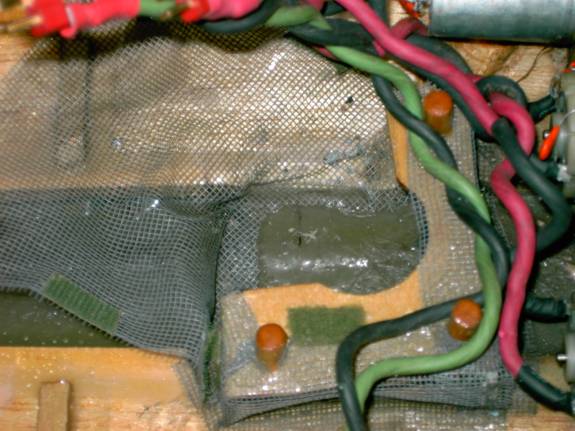
This is my pump housing. I use it on all my ships. It keeps the gunk away from the pump. I use CA glue to tack down the screen to the hull. The Velcro holds the screen together around the pump.
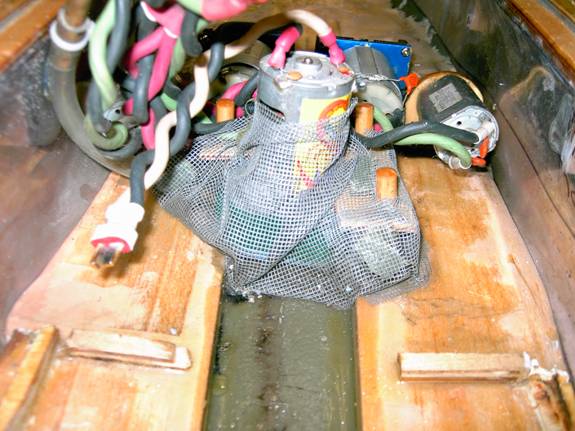
The pump in the house with the screen in place.
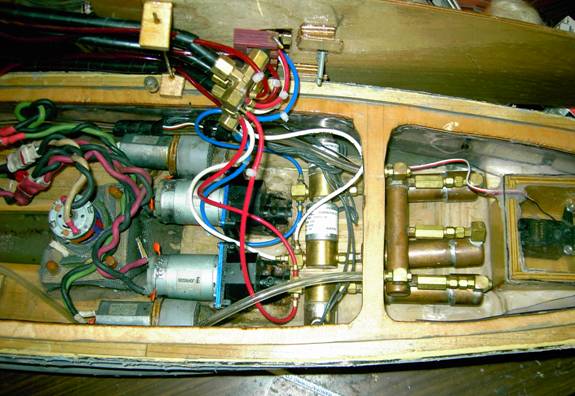
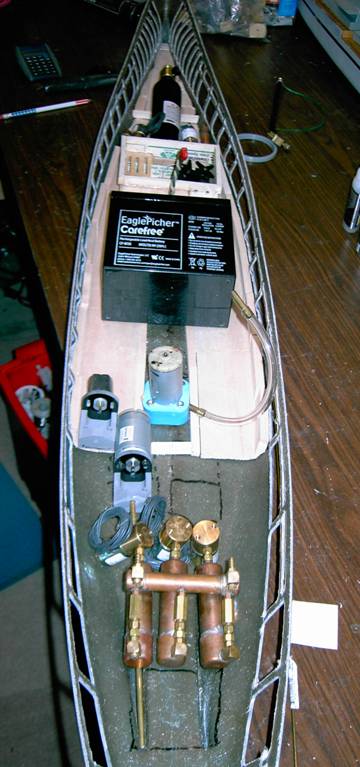
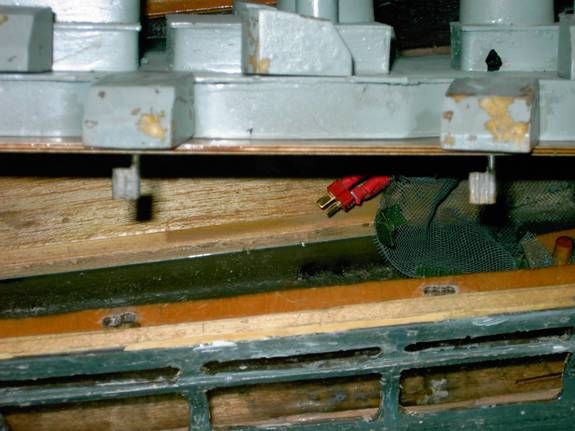
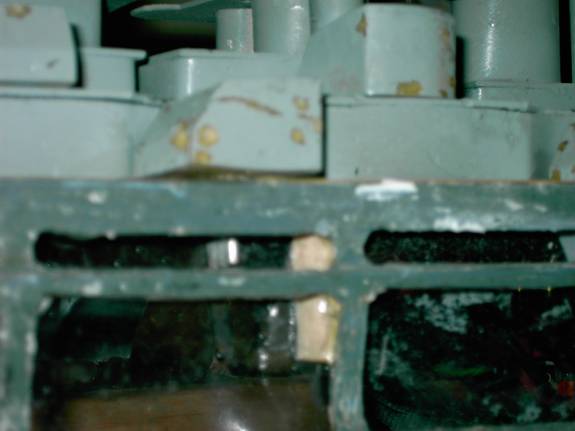
The stern 1/3 of the ship with solenoids and accumulation tanks installed. It’s a tight fit with the guns, gear boxes and solenoids. I spent a lot of time making sure everything fit before I locked things in place.
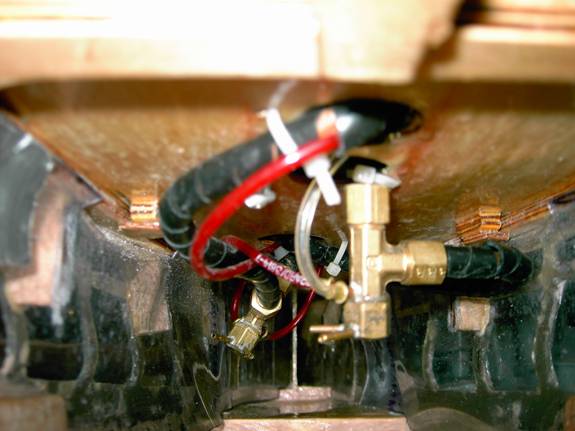
Here is the bow 1/3 of the ship. The regulator and 7oz bottle are up front with the bow solenoids on either side. When the battery is in place the radio box slides up to the back of the bottle.
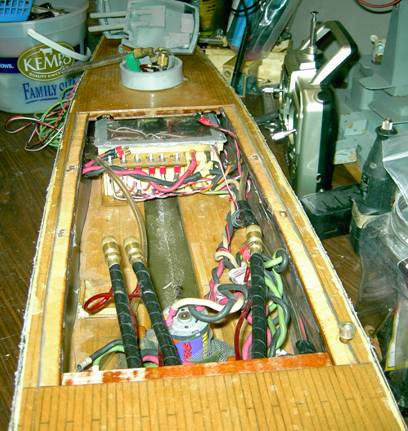
The middle of the ship holds the battery. The stern gun mags are straight and spread apart around the pump. You can see the test buttons on the radio box. I like putting them on the box because it cuts down on connectors. I really need to make a cover for the switches because I hit them getting the main deck on and fire the guns into the safety pins. At the right you can see the pump outlet coming out of the deck. I have a little piece of hose around it to help protect it from bbs.