
- Tourville -
FN Tourville – Tyler
3.0 units, 23 seconds, French Heavy Cruiser
The FN Tourville was built in 2008. Due to time, some
level of disrepair, and some less developed wood working techniques when first
constructed, it was time for an upgrade. The deck rim had come loose at the
starboard bow, the superstructure was shredded, the rudder was built too small
and was inside a water tight box which I no longer favor, the penetrable area
below the water line was too deep, and the entire hull was slightly too tall. I
decided that it was worth saving as it has been a fairly sturdy ship otherwise and
it is actually fairly forgiving for new captains because the hull volume is
relatively large for a cruiser. Before the refit, its last battle was Nats in 2019 with Andy at the helm, and before that had
been battled locally from time to time by McCoy and other newer captains. The
refit was done in the spring of 2020.
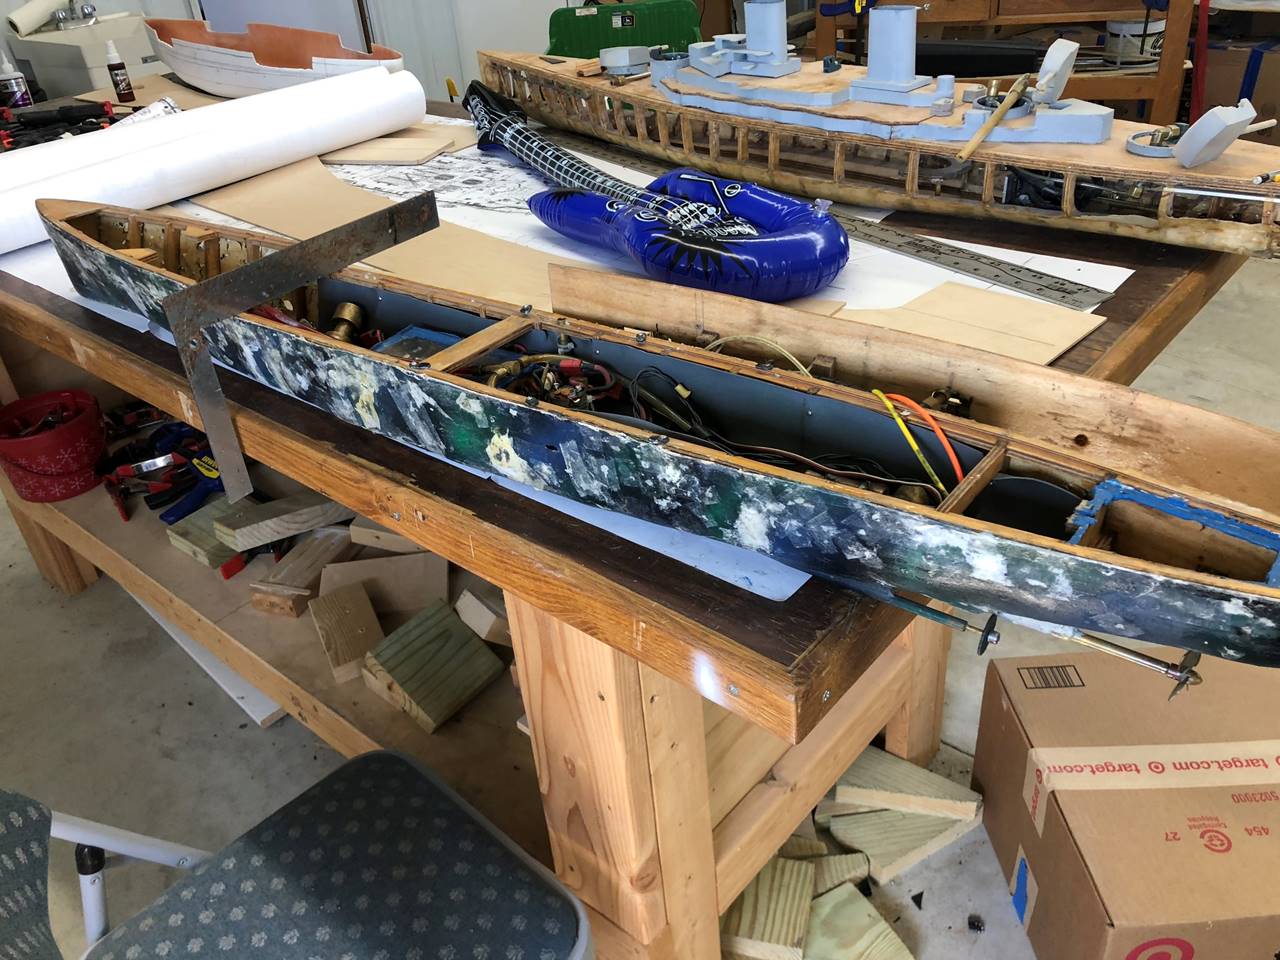
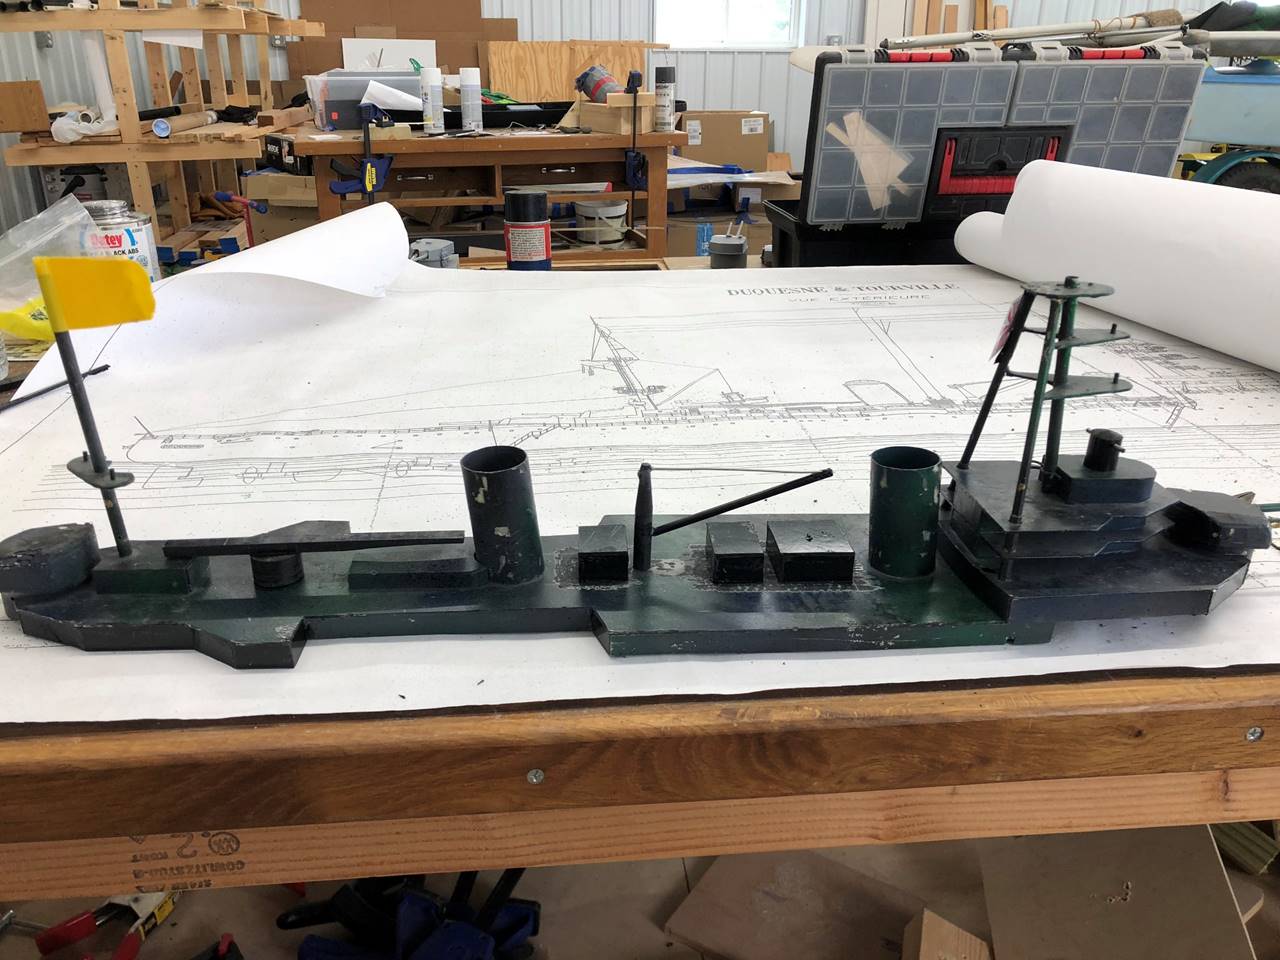
Here she is next to the Derfflinger
(both were originally built at about the same time, it is also undergoing a
refit) and an inflatable guitar. The ruler isn’t really something you can read
from this angle but it was trying to showing how the hull was too tall. The
hull skin has been on since at least 2009 Nats when
Hudson painted it up with “camouflage” as inspired by Randy and stuck a
Japanese flag on it for Nats (to match his Kongo).
Prior to this I had already done some more minor refits to the ship. The water
tight rudder box was opened and a water proof servo was installed but the same
running gear was used. A cross brace amidships was added as there was not
enough lateral support as built. And slides for the bow deck latching system
had been installed.
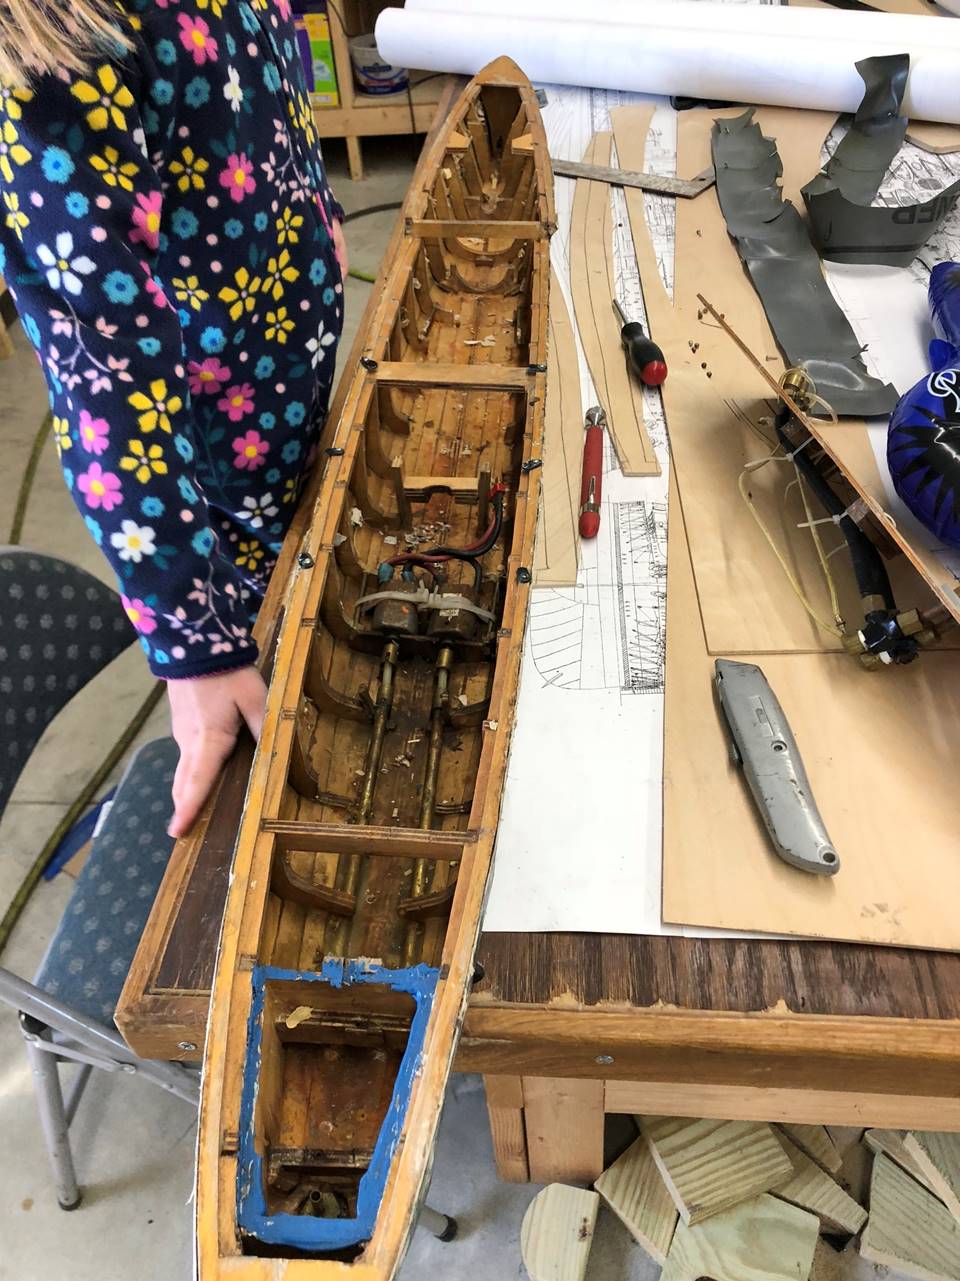
This picture was taken after the internals were mostly
ripped out. Since I already knew where the water line was, I stabbed a knife
through the hull skin and marked on some of the ribs on the inside, as well as
took measurements in relation to the workbench. You can see where the starboard
upper part of the step deck has come completely off. It’s hard to find good
help, but the 4 year old in flower footie pajamas pulls her weight.
I removed the hull skin and sanded the sides down to
wood again. I notched into the ribs at the level where the newly installed
impenetrable area would start, which ended up about ½ inch higher than where it
was built. The notching allows for a smoother transition/seam when the balsa
sides are later added. I put a strip of 1/32 inch ply wood to define the top
edge and would usually just fill it in from there with planking, but since this
is a large cruiser I wanted to add some water channeling in the bulges as well.
Most cruisers don’t really require bulge water channeling.
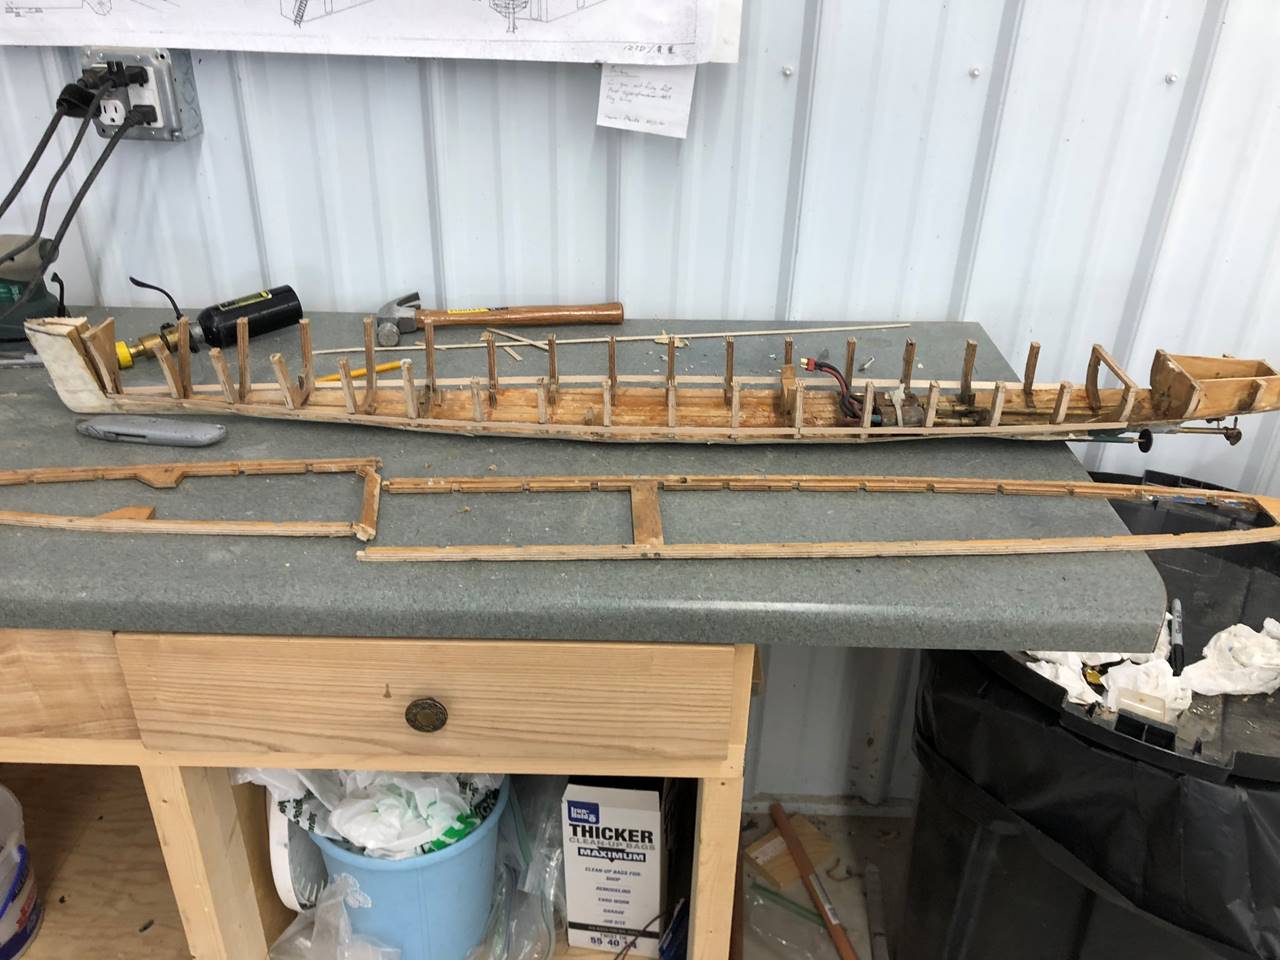
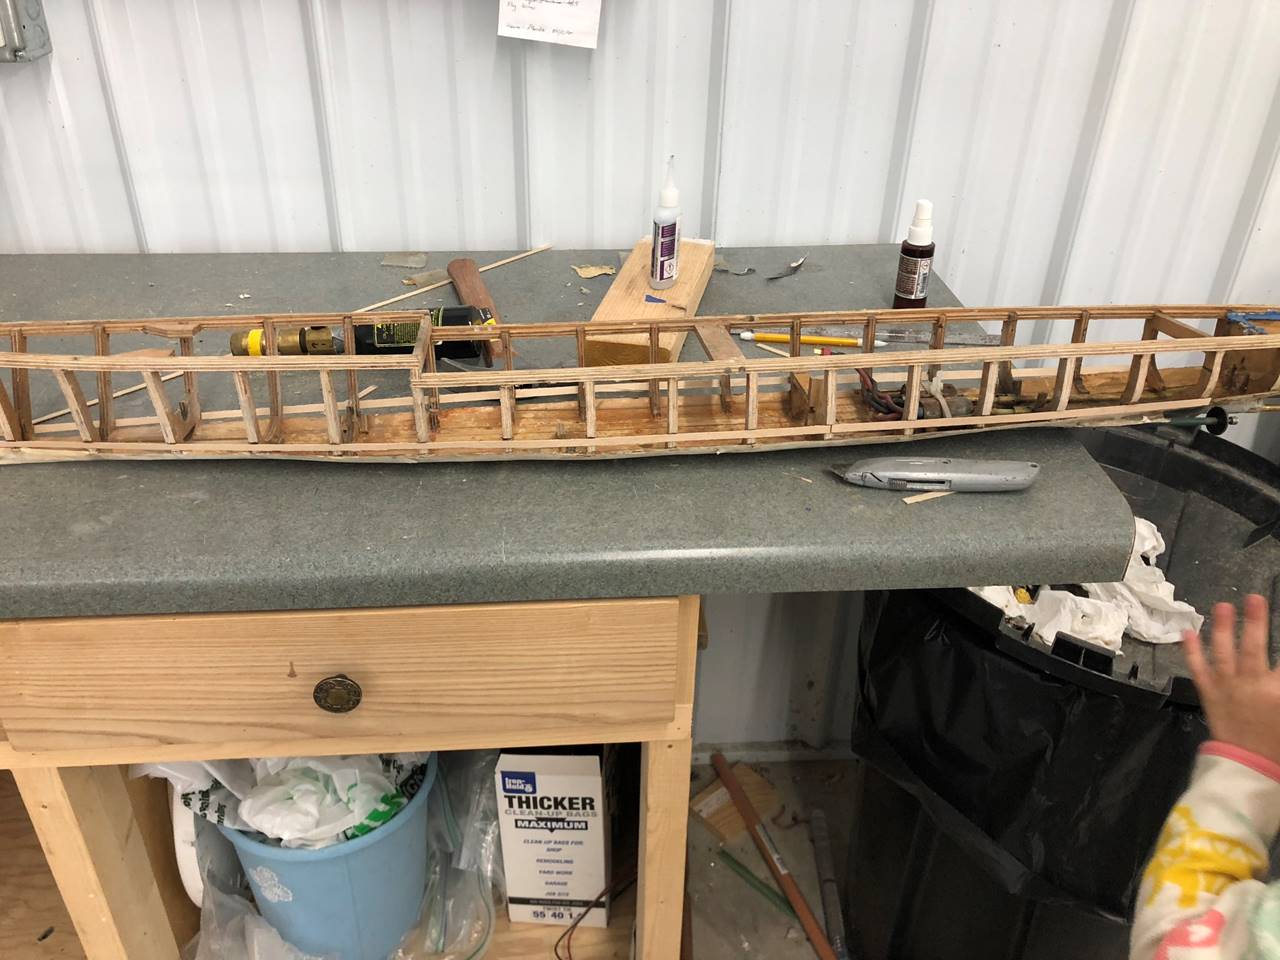
The deck/subdeck was both broken and too tall. I opted
to try just cutting the whole thing off with a band saw and cutting the ribs
back down to size before gluing the deck/subdeck back on. This is probably the
most anxiety provoking thing I have ever done in relation to this hobby. I was
happy with how strong the bottom of the ship was and it didn’t really flex or
warp.
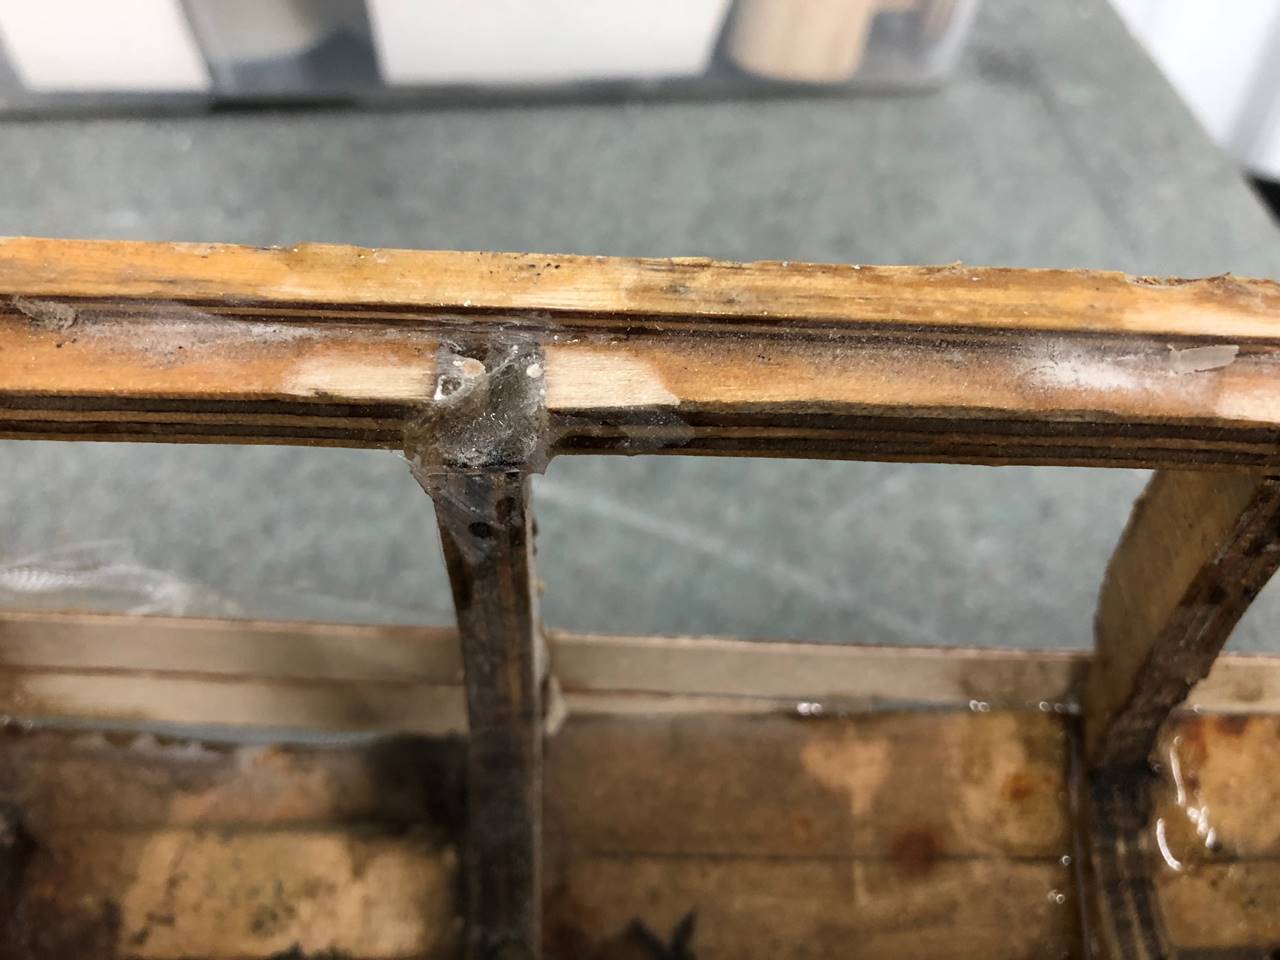
I re-notched the top of the ribs to accept the subdeck
after cutting them down, but actually did it wrong for the stern 2/3 of the ship.
I added a wood pin to try to hold things in place and fiber glassed with epoxy
where the wood notch should have gone. This picture is part way through the
process where it is getting built up over several coats. I will also build up
some fiber glass/epoxy to the under-side where the rib and sub deck connects.
The bow water channeling built up to the added height
as well. You can see the older yellowed color where it used to be. Also the
seam where the ribs meet the subdeck became a bit irregular and was requiring
some sanding.
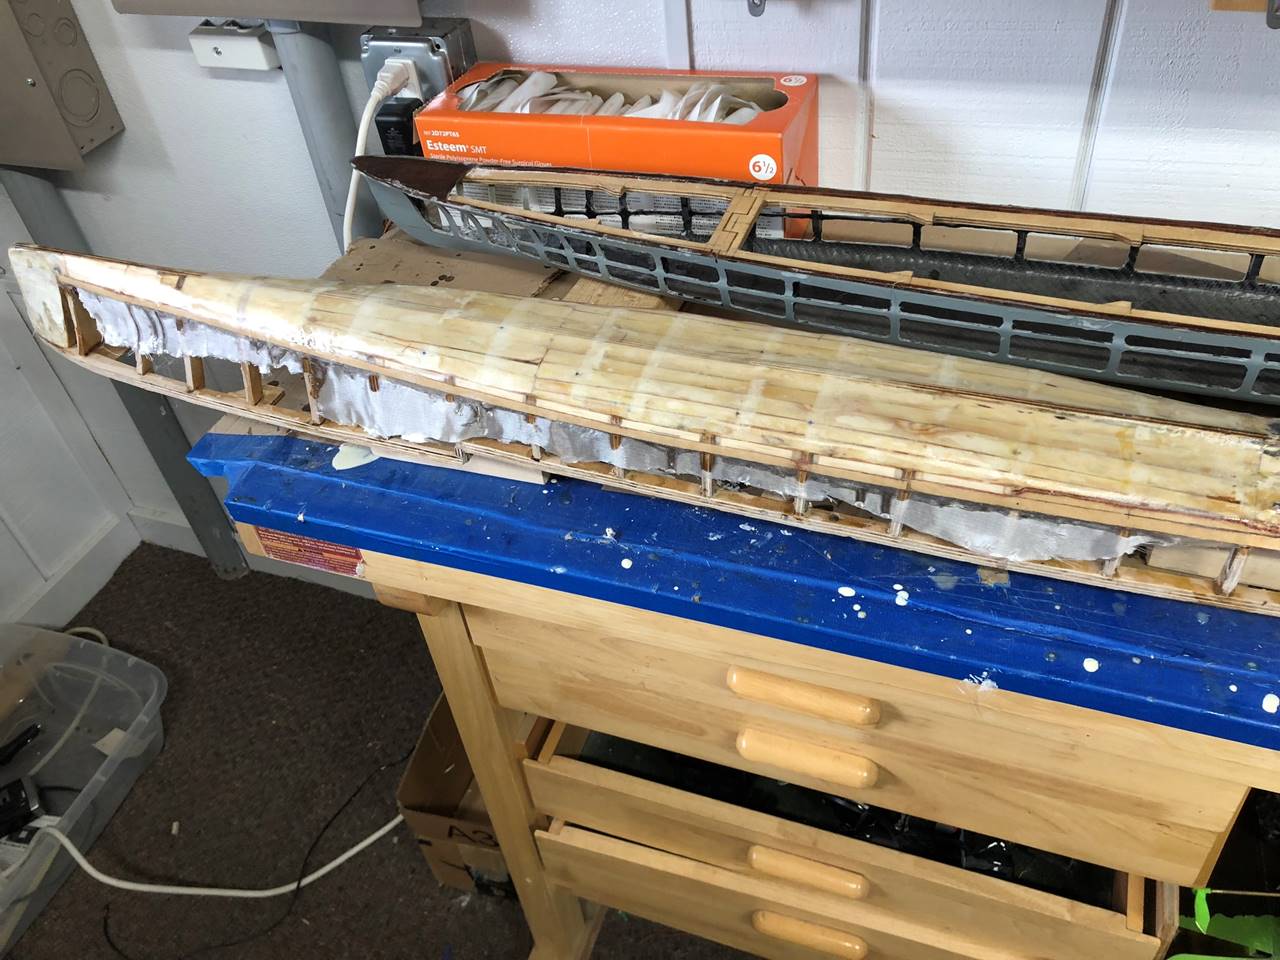
You can see both the strip of 1/32 inch thick ply wood
strips and the balsa wood I added to the bulges. On the far right of the
picture there were two 1/4 inch wide stirps of ply
wood and no balsa, so you can see the difference. On the newly built portions I
put a strip of heavy (5oz) fiber glass cloth with epoxy, then the entire bottom
was also sanded down and you can even see the lines where the prior layers of
fiber glass were overlapped. I used a less rigid type of epoxy when I
originally did the hull so I opted to re-cover it all but with a lighter weight
fiberglass cloth (1.5oz) to go over the top (which is really the bottom of the
boat) for one more layer.
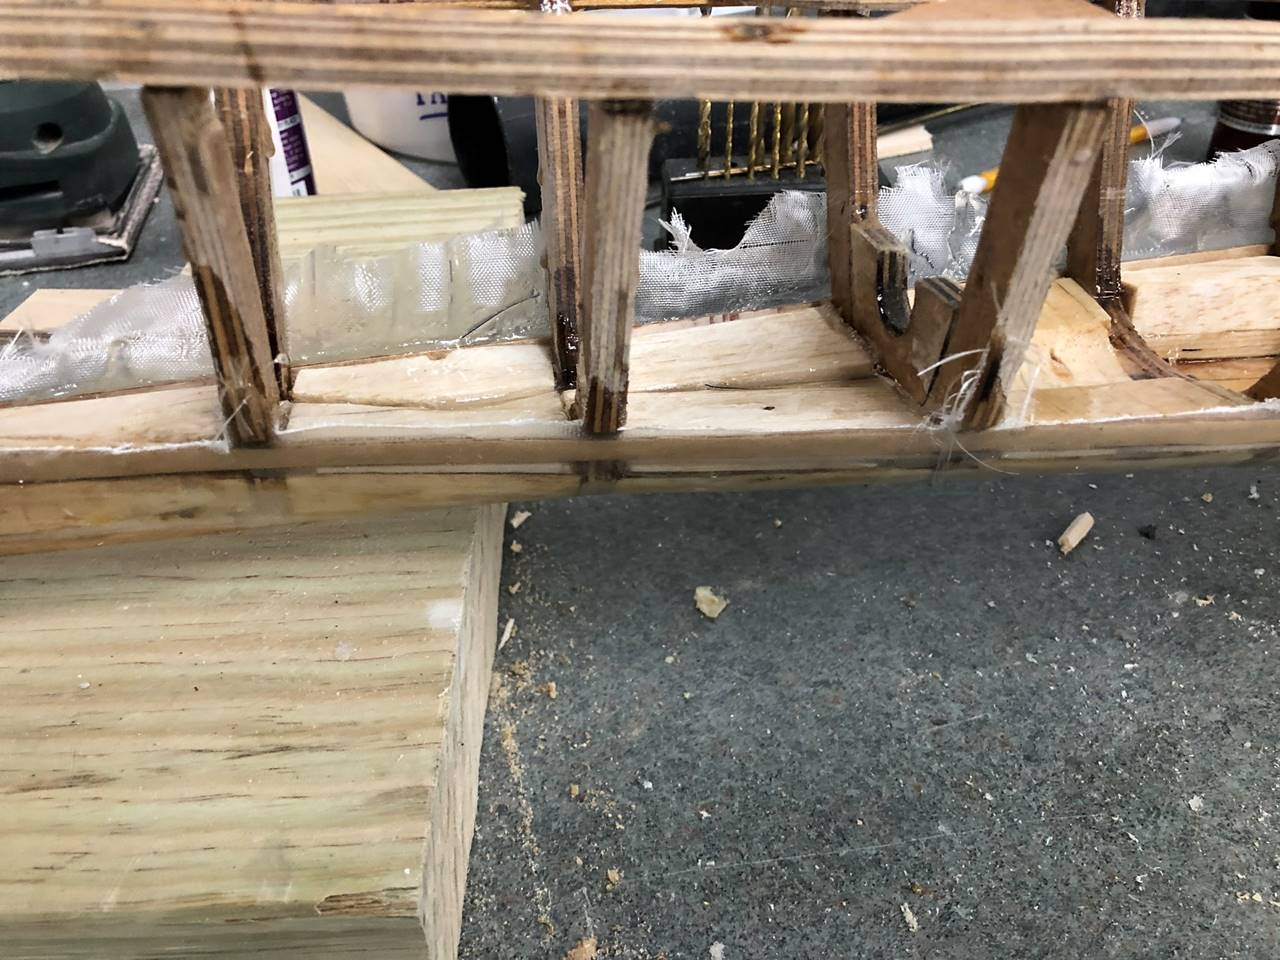
This is a closer look at the midship bulge section
where I built up the impenetrable lower part of the hull ½ inch higher than it
was built to the correct level in relation to the floating waterline. The balsa
blocks are only ½ inch wide and may not actually add much competitive advantage
in a smaller ship in terms of survivability, but it might just help the water
settle more level as it sinks.
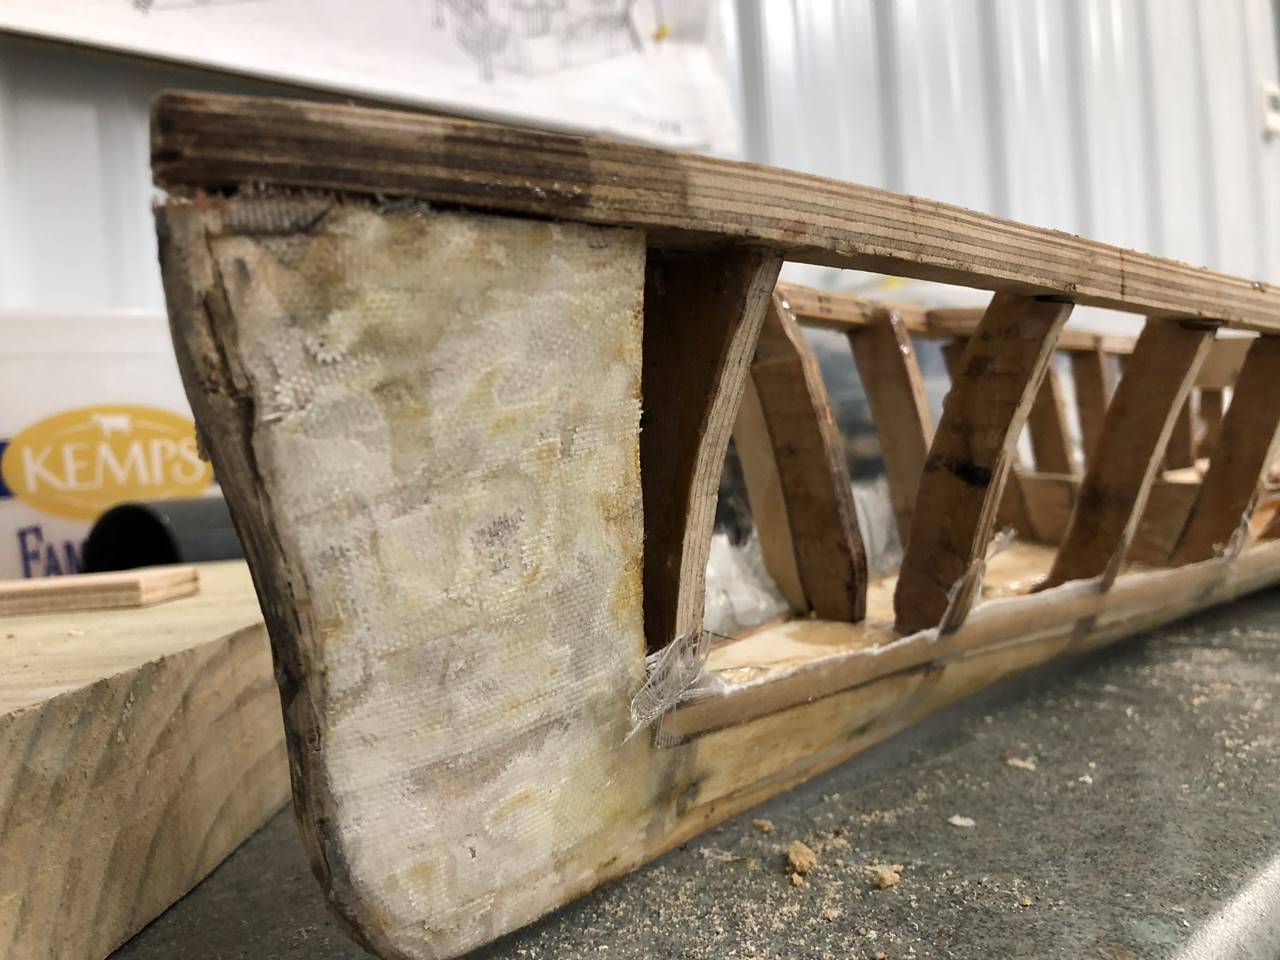
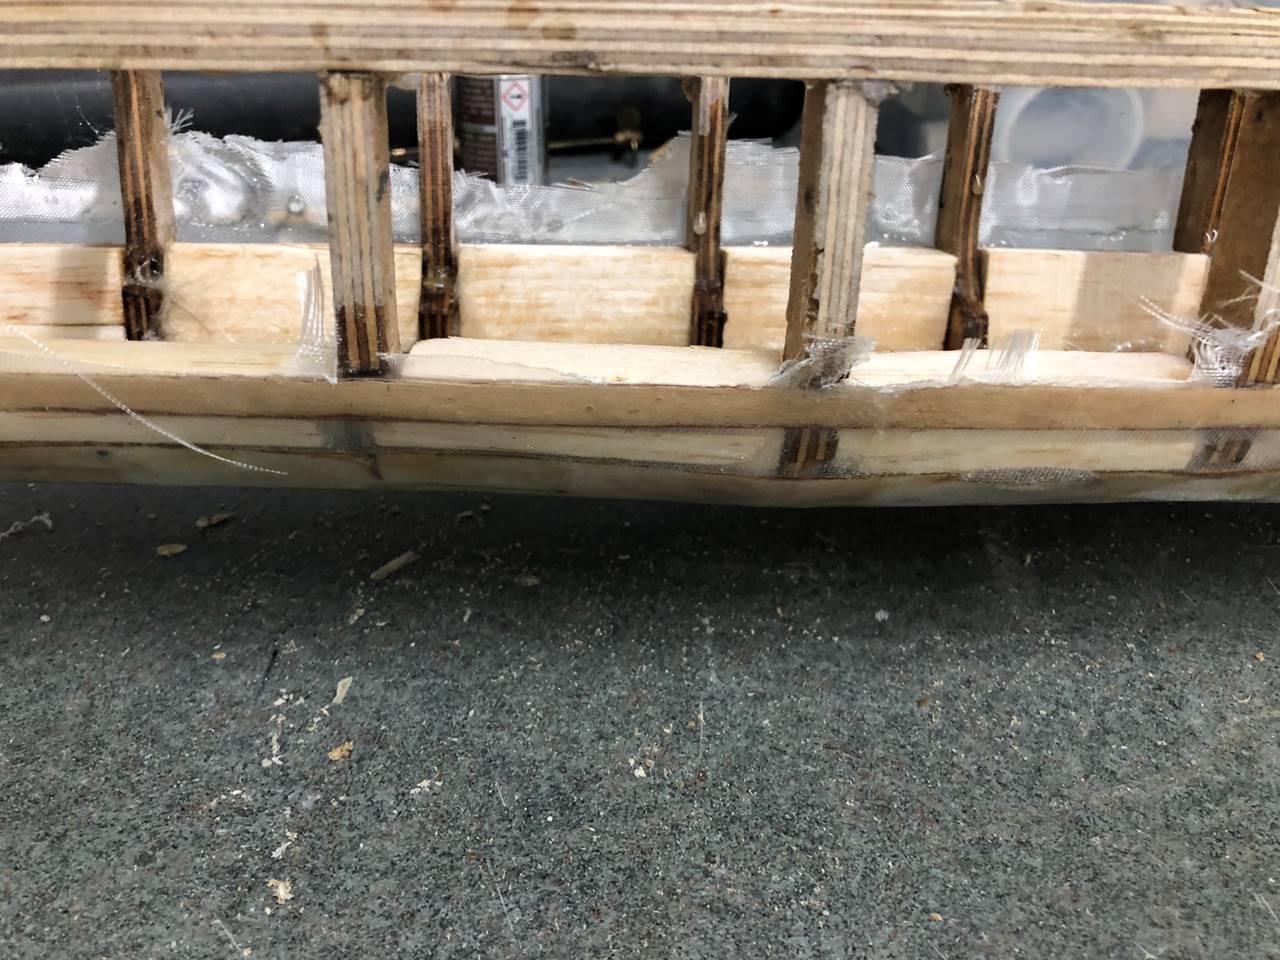
Here is a view of the bow. The 2 inch bow most hard
area needs another layer of fiberglass cloth and epoxy, there are areas that
are clearly delaminating in part from use but in part from not being previously
sealed completely and taking water damage. You can see the added water
channeling in the bow from this angle. You can also see how one of the ribs was
cut incorrectly (starboard 2nd rib) and the ship was slightly
crooked as built. I have meshed in a new section of rib that will be sanded to
shape and actually did 2 more ribs later on in the same way.
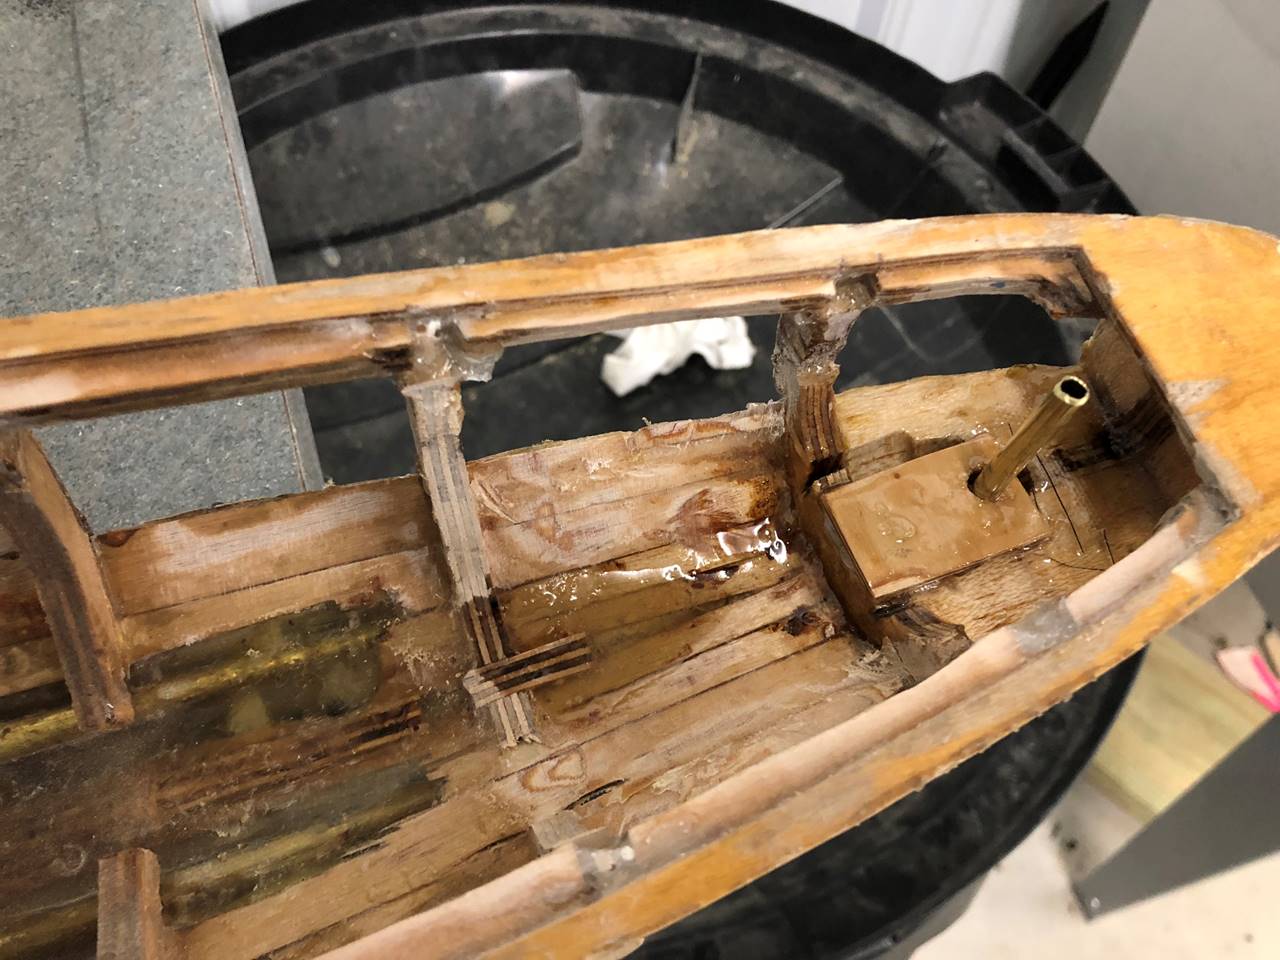
I’ve been meaning to make the rudder the correct size
(it was built too small) for years but was hesitant to do so because to do it
right I knew I would have to cut out the entire back end and start over. Here
is that process underway, with the rudder moved roughly ½ inch towards the
stern.
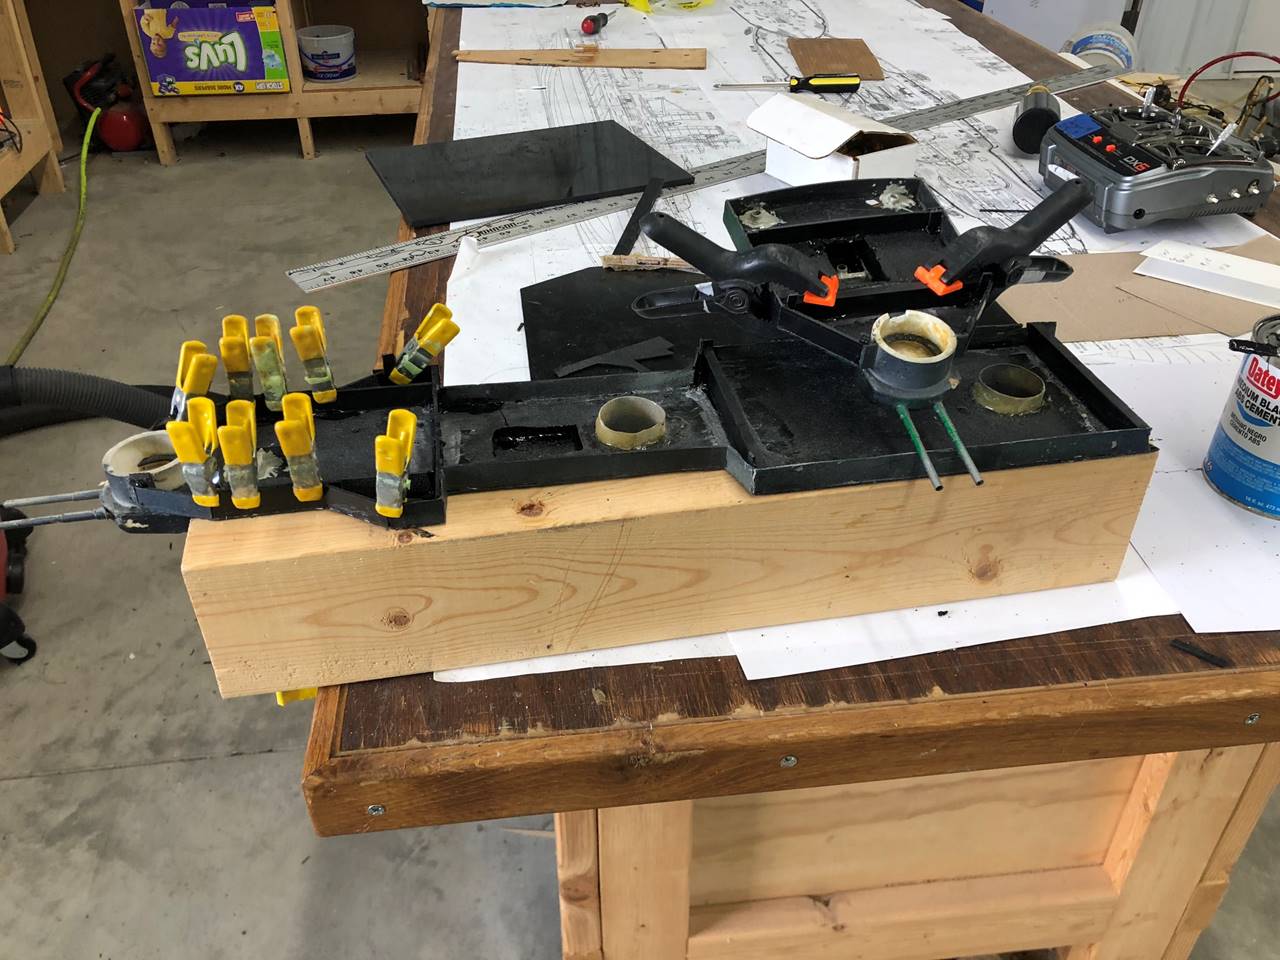
The superstructure over the years was heavily damaged.
Several of the side walls were blown out. Much of the damage was because it was
originally made of ABS plastic with the incorrect PVC cement which held OK but
not as firm as the ABS cement does. Also the attachment parts and various other
parts were placed with epoxy and had some ply wood in it as well, so I had to
sand a bunch of that out to get back down to the ABS plastic so I could do it
correctly.
The smoke stacks are formed fiberglass made by wrapping
fiber glass cloth around a dowel with cling wrap and super gluing it, then
adding epoxy over the top and epoxy to hold it to the ABS super structure level.
The turrets are each balsa blocks with fiberglass cloth along the outside. I
added a few of the boxy things that were not there previously as well as an
aircraft catapult and a crane. The turrets will be replaced with molded ones.
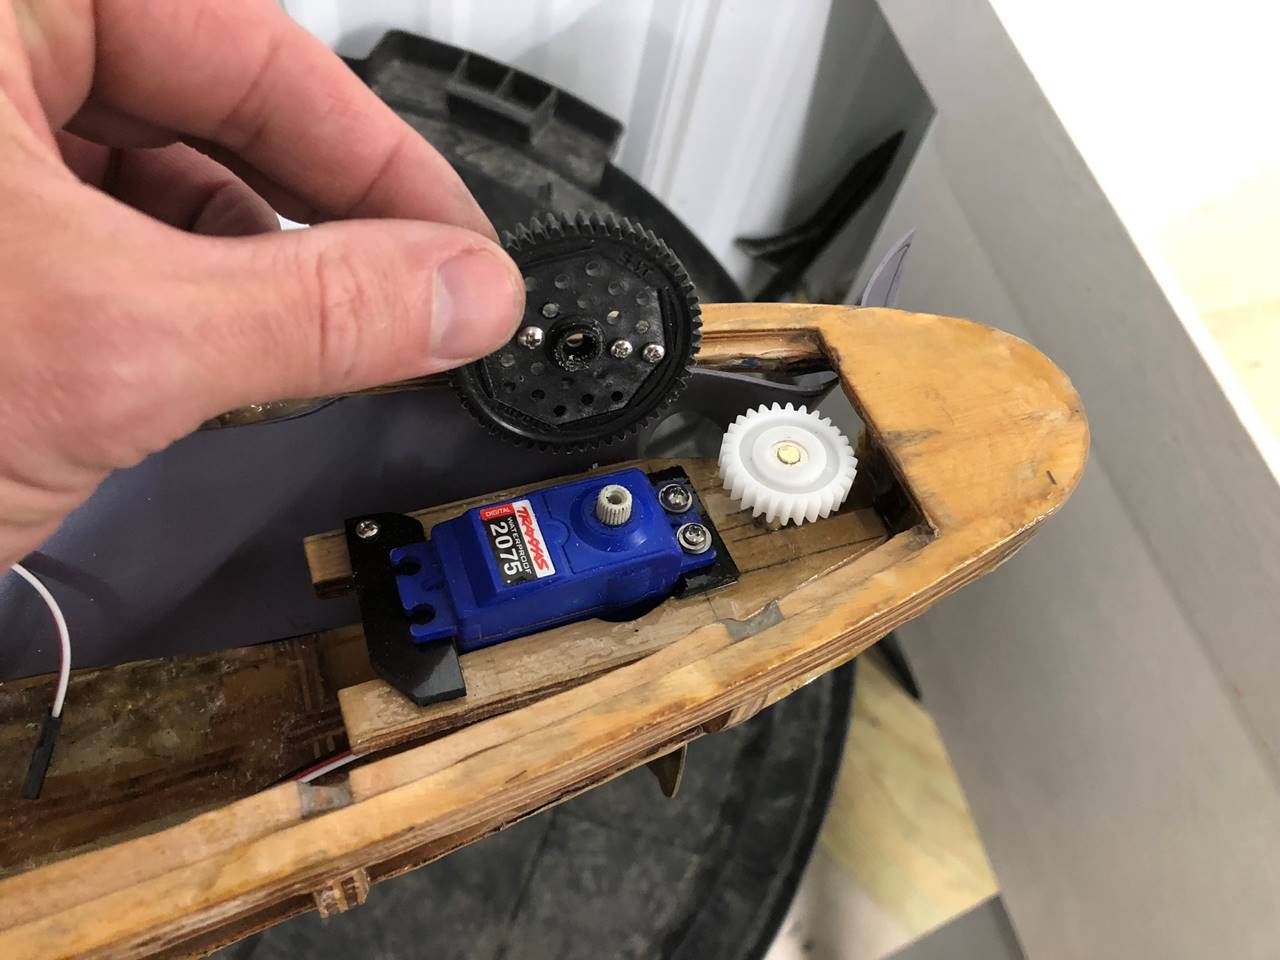
The rudder box was completely removed, now the rudder
is a water proof servo screwed into a U-shaped form. The larger gear directly
drives the smaller white gear which is attached to the rudder.
Most of my ships have moved to this style of rudder
setup. It is easy to fix/replace and quite adjustable if needed but very solid
otherwise.
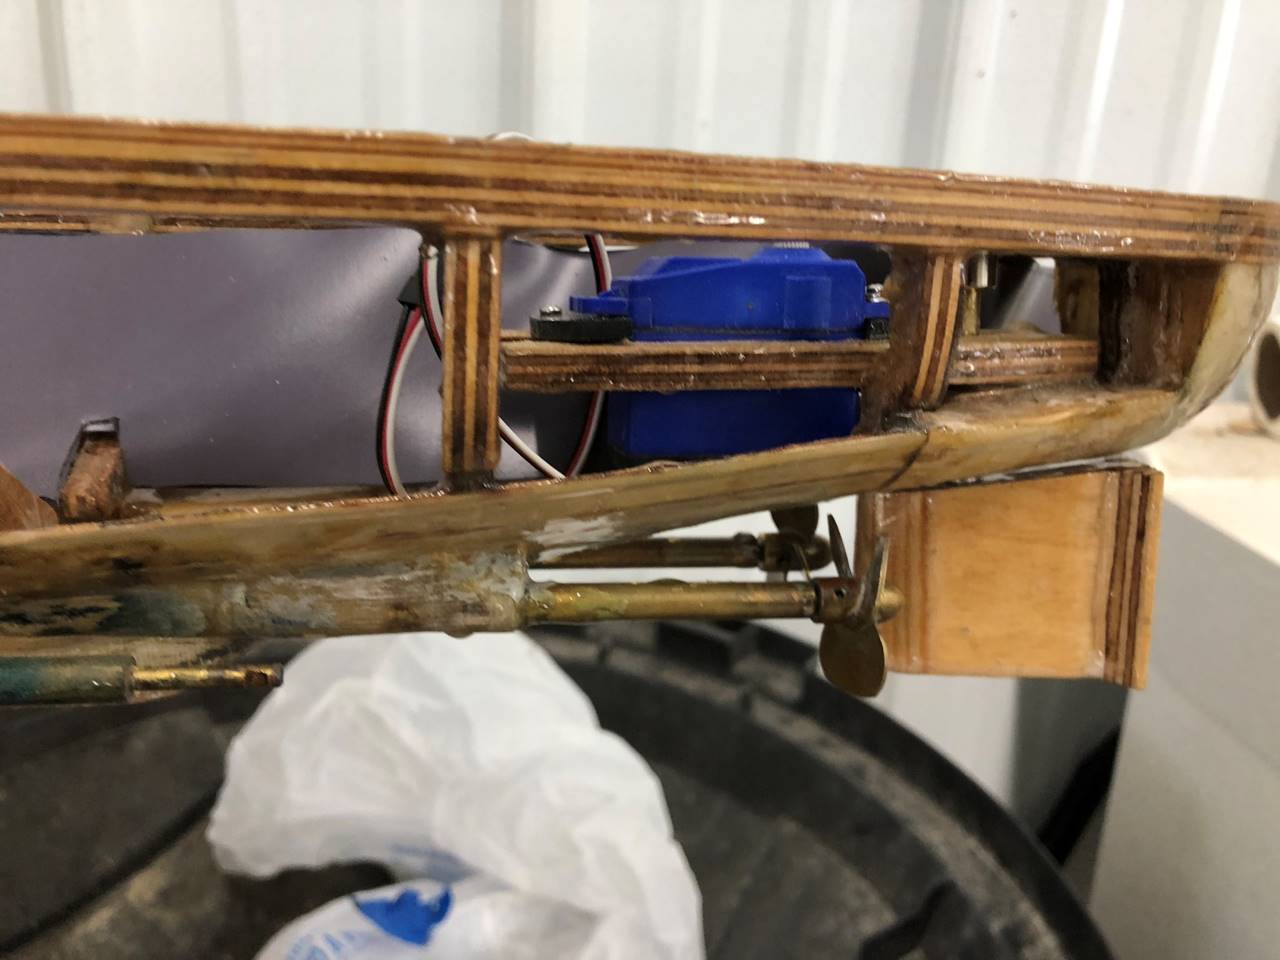
Side profile with internal armor being installed on
the starboard side. It’s a bit of a stretch but you can see a few key features
were unchanged: bottle holder in the bow, pump holder behind the middle cross
brace, motors (though the mounts were slightly improved). You can also see the
4 additional slide style deck holders to the stern of the cross brace so I can
get rid of the small latches that were on the top side of the deck.
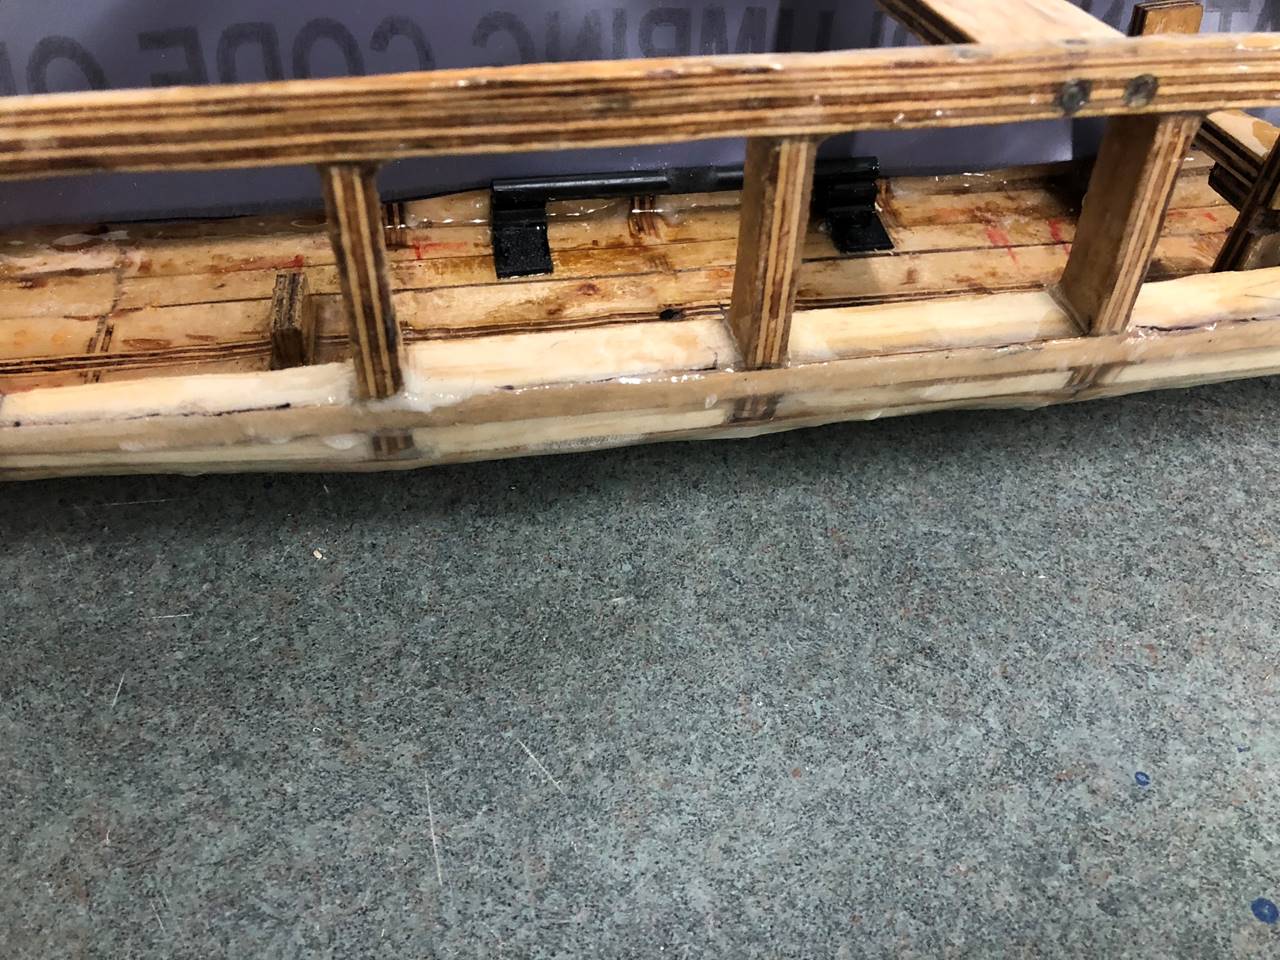
This is a closer look at the built up balsa in the
bulges of the ship. Its only about ½ inch wide and 1 inch tall. The top is
sealed with epoxy with fiber glass cloth over the top. You can also see the
radio box holder. All of my cruisers have servo activated switches for drive,
pump, and guns and all are the exact same dimensions and are completely
interchangeable.
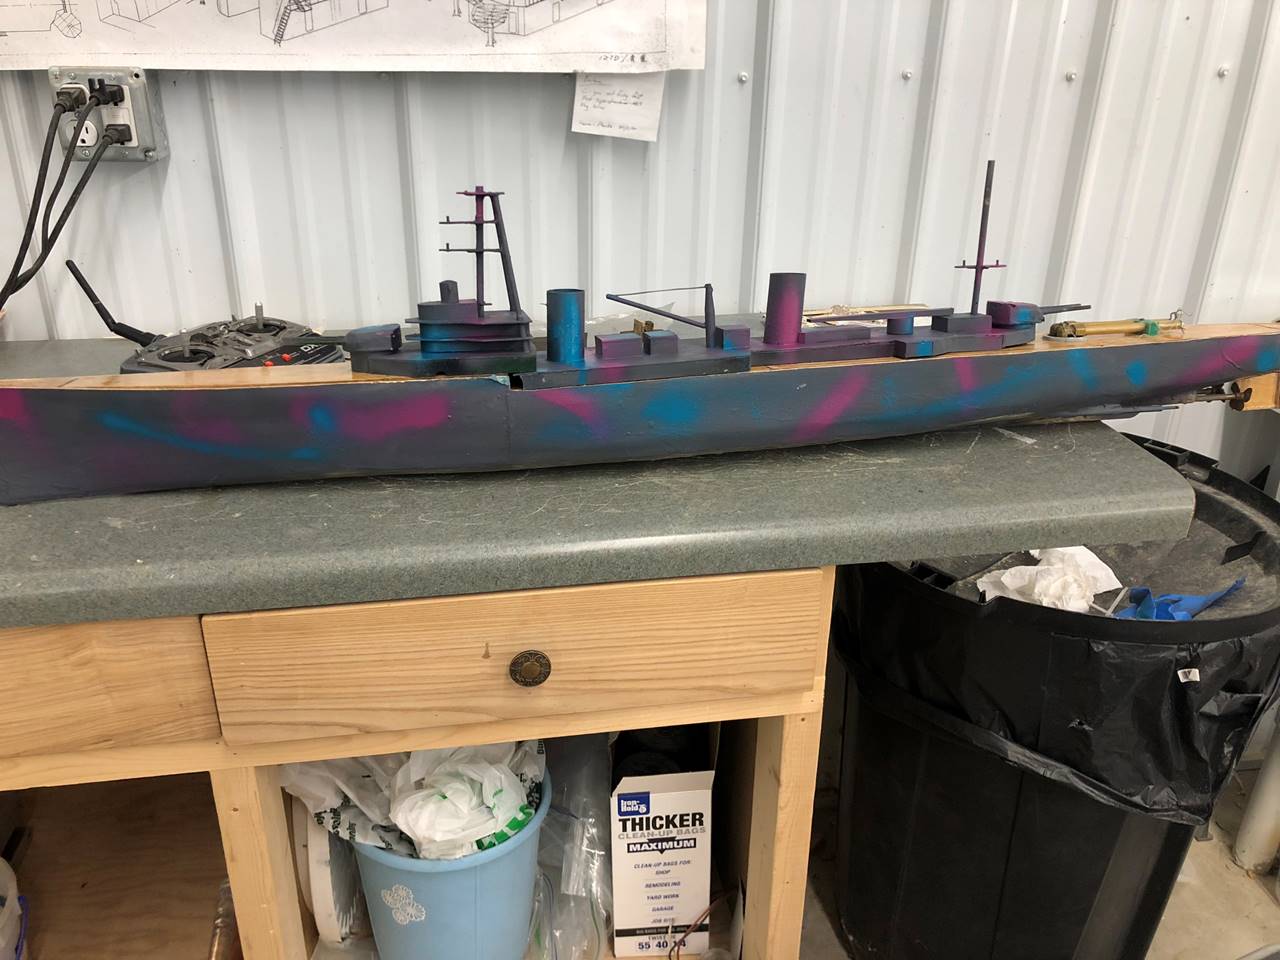
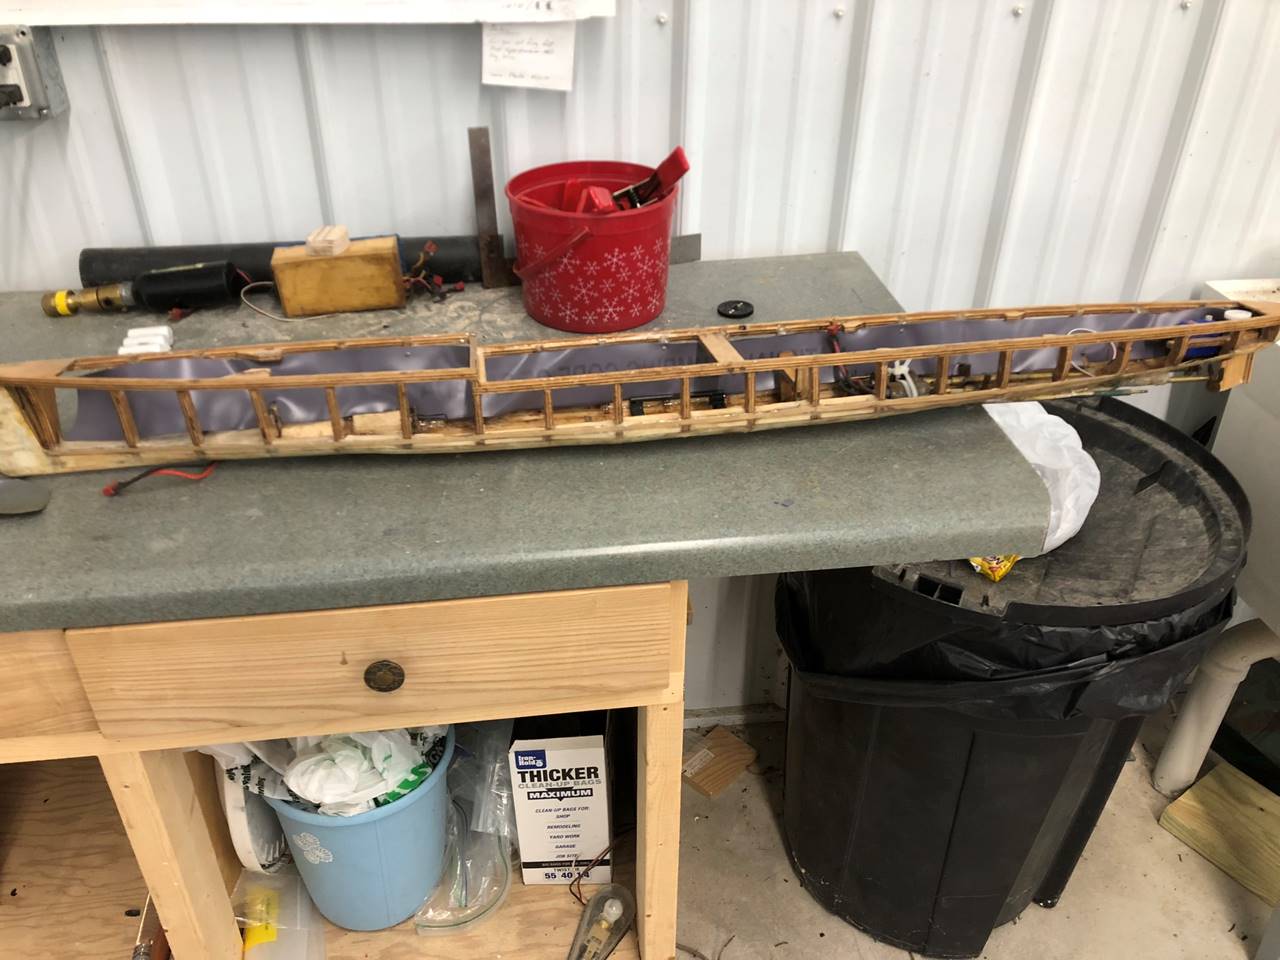
Side profile of the ship minus the forward most and
stern most turrets. The hull was done with my favorite color of dark gray and I
was going to sprinkle in a little blue and green in honor of it’s prior Randy
inspired Hudson paint job, but my daughter talked me into vibrant purple and
blue, it actually looks pretty cool in the daylight.
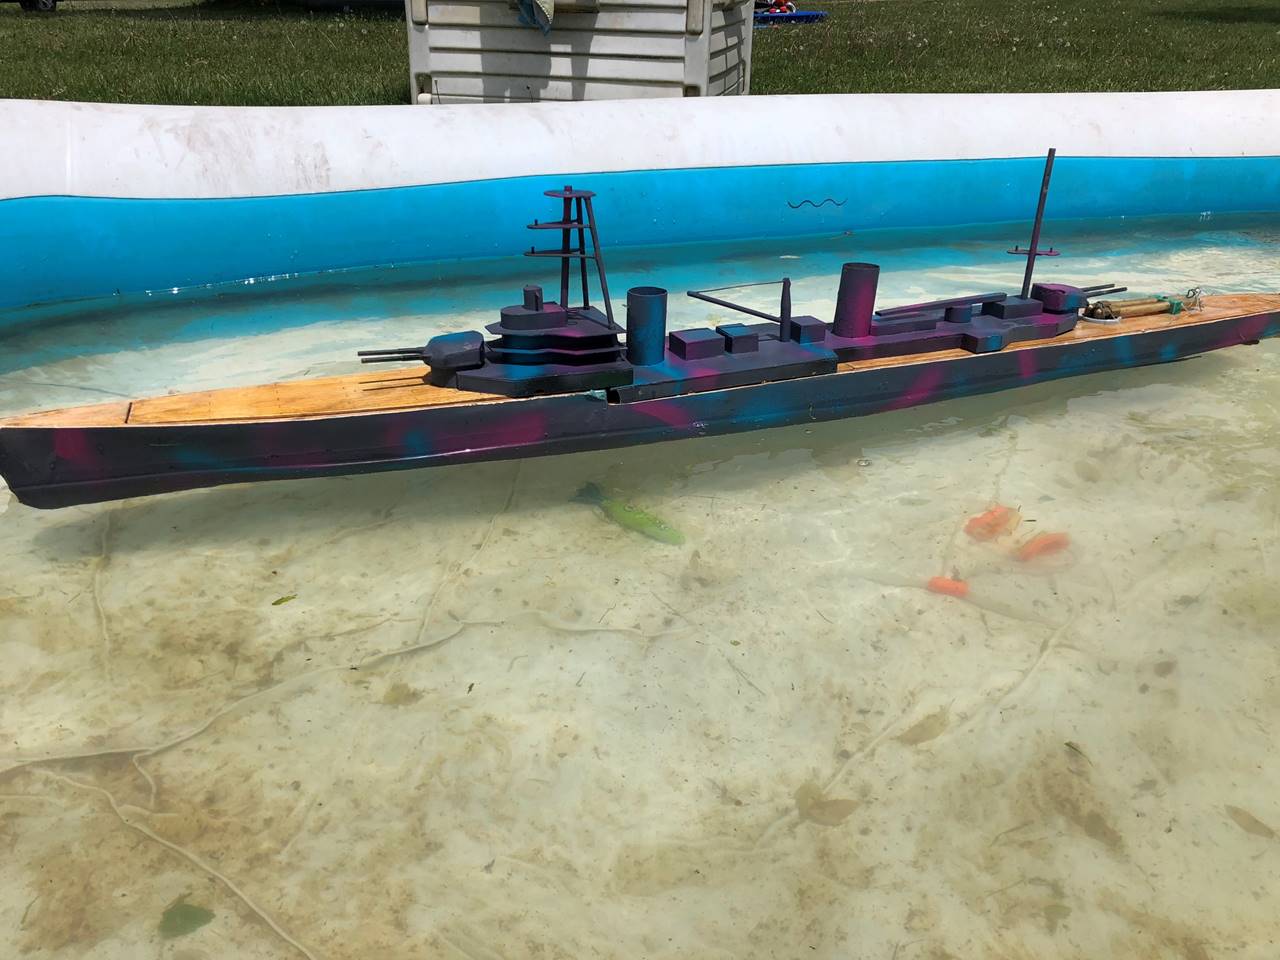
Float testing before sender her off on her first
battle.
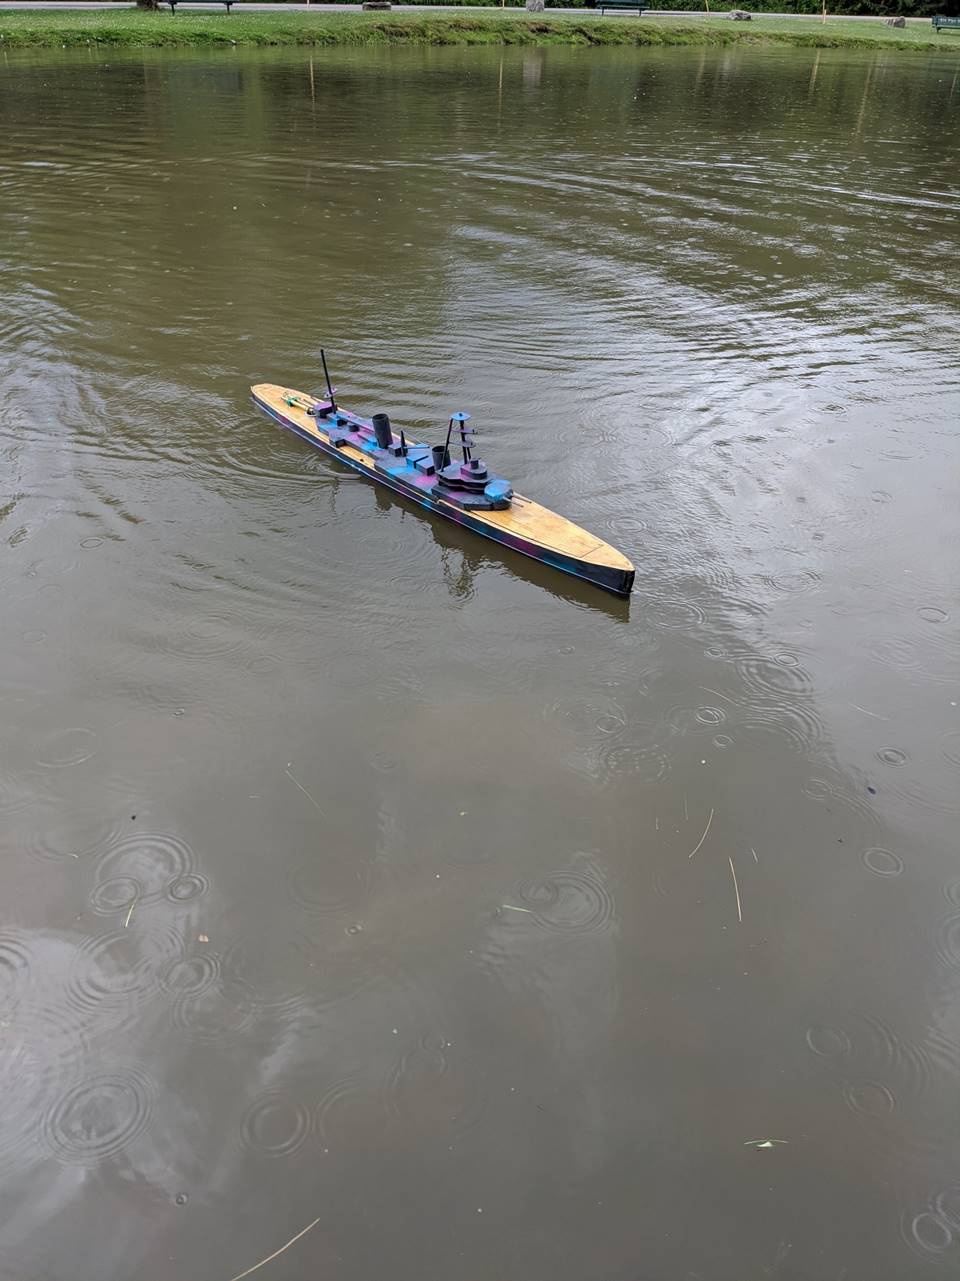
Andy battled the newly refit Tourville at Nats in 2020. The battle report is that the motors need to
be replaced and the guns looked at, but otherwise seemed to perform OK.